
Предположим, что нужно записать макрос, открывающий часто используемые книги при запуске Excel. Для этого можно создать макрос Auto_Open. Можно также запускать макрос автоматически при открытии книги.
Прежде чем начать, убедитесь, что на ленте доступна вкладка Разработчик. Если ее нет, выполните указанные ниже действия.
-
Откройте вкладку Файл и выберите пункт Параметры, а затем — категорию Настроить ленту.
-
В разделе Настройка ленты в поле Основные вкладки установите флажок Разработчик.
-
Нажмите кнопку ОК.
Чтобы при запуске Excel автоматически открывались книги, выполните указанные ниже действия.
-
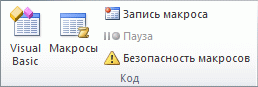
Откройте вкладку Разработчик и нажмите кнопку Запись макроса.

-
В поле Имя макроса введите Auto_Open.
-
В списке Сохранить в выберите пункт Личная книга макросов.
-
После этого макрос будет доступен при каждом открытии Excel.
-
Чтобы было проще вспомнить, что делает макрос, введите его описание в поле Описание. Можно также оставить это поле пустым.
-
Нажмите кнопку ОК.
-
Откройте вкладку Файл, выберите пункт Открыть и выберите файлы, с которыми работаете каждый день. Они могут находиться в разных местах. Чтобы выбрать несколько файлов в одной папке, щелкните каждый из них, удерживая нажатой клавишу SHIFT.
-
Откройте вкладку Разработчик и нажмите кнопку Остановить запись.
-
При закрытии Excel в конечном итоге будет предложено сохранить изменения в личной книге макросов. Нажмите кнопку «Да», чтобы макрос запускался при каждом запуске Excel.
Каждый раз при запуске Excel автоматически будут открываться книги, включенные в макрос.
Нужна дополнительная помощь?
Skip to content
На чтение 2 мин. Просмотров 5.2k.
Что делает макрос: Этот макрос открывает диалоговое окно, в котором отображаются только excel-файлы, тем самым позволяет открыть конкретную книгу
Содержание
- Как макрос работает
- Код макроса
- Как работает этот код
- Как использовать
Как макрос работает
Данный макрос открывает диалоговое окно, как показано на рис, что позволяет пользователю просматривать и открывать файл Excel.

Код макроса
Sub Macro7()
'Шаг 1: Определяем переменную.
Dim FName As Variant
'Шаг 2: Метод GetOpenFilename активизирует диалоговое окно.
FName = Application.GetOpenFilename( _
'a – определяем тип файла
FileFilter:="Excel Workbooks,*.xl*", _
'b – заголовок окна
Title:="Выбери файл, который надо открыть", _
'c – множественный выбор
MultiSelect:=False)
'Шаг 3: Если был выбран файл, открыть его!
If FName <> False Then
Workbooks.Open Filename:=FName
End If
End Sub
Как работает этот код
- Первое, что делаем — объявляем переменную типа Variant, будет содержать Имя файла, который пользователь выберет. FName — имя нашей переменной.
- На шаге 2 мы используем метод GetOpenFilename, чтобы вызвать диалоговое окно, которое позволяет просмотреть содержимое папки и выбрать нужный нам файл. Метод
GetOpenFilename поддерживает несколько настраиваемых параметров:
a. FileFilter параметр позволяет указать Тип файла, который мы ищем.
b. Title позволяет изменить заголовок, который отображается в верхней части диалогового окна.
c. MultiSelect — параметр множественный выбор позволяет ограничить выбор в один файл. - Если пользователь выбирает файл из диалогового окна, переменная FName берёт Имя файла, который выбрали. Если переменная не пустая, мы используем метод Open из книг
объекта, чтобы открыть файл.
Как использовать
Для реализации этого макроса, вы можете скопировать и вставить его в стандартный модуль:
- Активируйте редактор Visual Basic, нажав ALT + F11.
- Щелкните правой кнопкой мыши имя проекта / рабочей книги в окне проекта.
- Выберите Insert➜Module.
- Введите или вставьте код во вновь созданном модуле.
- По желанию, можно назначить макрос к кнопке, чтобы открыть файл.
|
1 / 1 / 0 Регистрация: 15.01.2012 Сообщений: 64 |
|
|
1 |
|
|
Excel Выполнение макроса только в определённой книге31.01.2019, 16:31. Показов 2932. Ответов 2
Здравствуйте, подскажите, пожалуйста, как сделать, чтобы макрос выполнялся только в определённой книге, потому что когда у меня отрыто 2 или больше книг, то при запуске макроса , код выполняется на активной книге? Есть проверка, например,
0 |

|
amd48 779 / 461 / 79 Регистрация: 18.05.2016 Сообщений: 1,242 Записей в блоге: 4 |
||||
|
31.01.2019, 16:55 |
2 |
|||
|
Решение
1 |
 Сообщение было отмечено Титан4646 как решение
|
1 / 1 / 0 Регистрация: 15.01.2012 Сообщений: 64 |
|
|
31.01.2019, 17:00 [ТС] |
3 |
|
amd48, спасибо большое, это то, что нужно)
0 |

|
Макрос только для определенной книги |
||||||||
Ответить |
||||||||
Ответить |
||||||||
Ответить |
||||||||
Ответить |
||||||||
Ответить |
||||||||
Ответить |
||||||||
Ответить |
||||||||
Ответить |
||||||||
Ответить |
||||||||
Ответить |
||||||||
Ответить |


In Excel, you can make it so all of your macros can be easily accessed by any Excel workbook.
To do this we need to create what is called a «personal macro workbook» and then save it. All of the macros that we want to use in Excel will be stored within this personal macro workbook and will then be accessible by any Excel file.
Steps to Make any Macro Available in All Excel Files
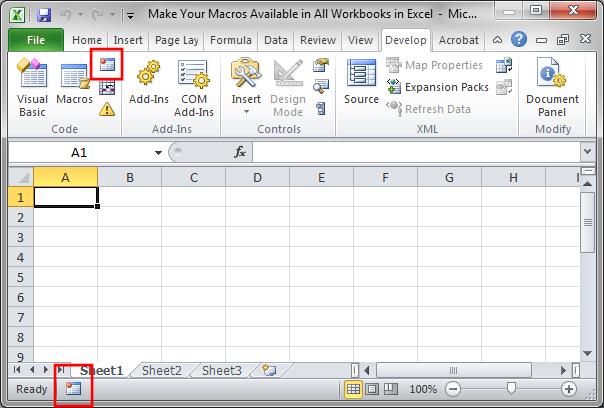
- Open an Excel file and then go to record a dummy macro, recording this dummy macro is what will create the «personal macro workbook» that we need in order to store the macros.
- To record a macro go to the Developer tab, if that is visible, or simply look to the bottom left of the Excel window. From there, click the Record Macro button:
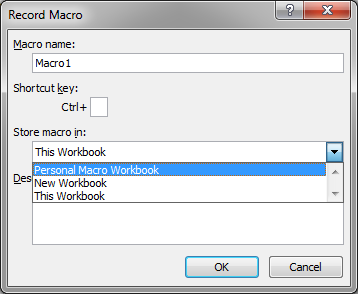
- On the screen that appears, make sure to select Personal Macro Workbook from the Store macro in: drop down box and then hit the OK button. Nothing else matters here because we just need to record a simple macro, anything really.
- Select any cell in the worksheet and then just click the Stop Recording macro button, which is in the exact same location as the Record Macro button in step 2.
- Now hit Alt + F11 on the keyboard so we can go to the VBA/Macro editor window. You will now see the PERSONAL.XLSB file appear in the top left pane of the window.
- All you have to do now is to add Modules and Macros to this file like you would to any normal Excel file. Double-click Module 1 and we see the macro that we just recorded:

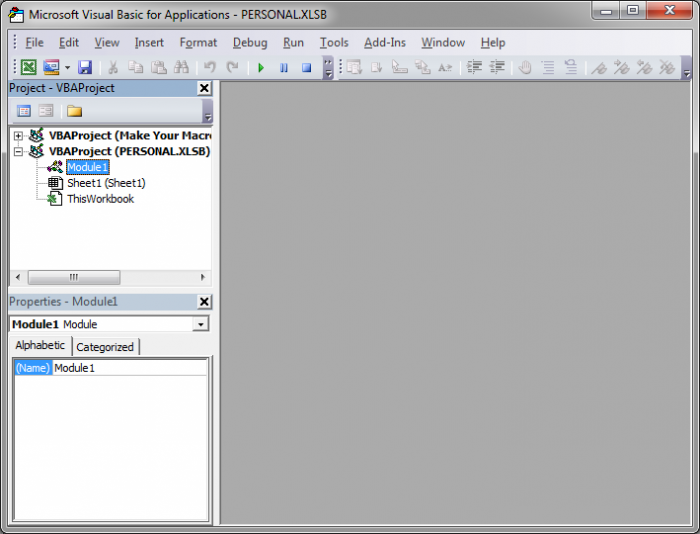
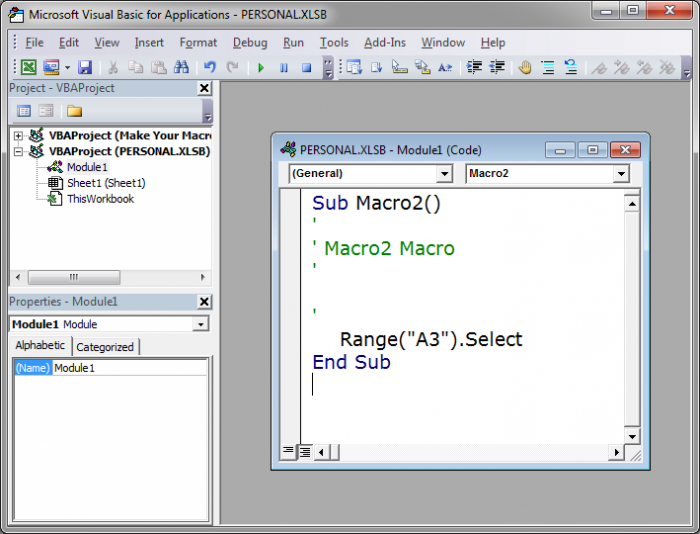
As you can see, this new PERSONAL.XLSB file behaves just like a regular file in the VBA window. This is where you will store any macros that you want to be able to access from all Excel files.
Notes
The personal macro workbook file does NOT travel with your Excel files when you send them; this PERSONAL.XLSB file only remains on your computer for you to use. So, if you send a workbook to another person, they will not be able to access the same macros that you have unless you also put those macros in the workbook you sent.
You must follow the above steps to create the personal macro workbook but, once you have created it, you can access it from any workbook on your computer by simply going to the VBA/Macro editor window (Alt + F11). As such, once it is created, adding macros to this new file is the same as adding it to any other Excel file — open any workbook, go to the VBA window, add a module to the PERSONAL.XLSB file and then add a macro.
The sample file for this tutorial is empty because, remember, you cannot send the personal macro workbook file with Excel files.
![]()
Excel VBA Course — From Beginner to Expert
200+ Video Lessons
50+ Hours of Instruction
200+ Excel Guides
Become a master of VBA and Macros in Excel and learn how to automate all of your tasks in Excel with this online course. (No VBA experience required.)
View Course
Similar Content on TeachExcel
Vlookup Function That Searches The Entire Workbook in Excel — UDF
Macro: With this VLOOKUPWORKBOOK function, you will have to power to more quickly and easily ana…
Copy and Paste Data using Macro VBA in Excel
Tutorial: How to copy and paste data using a Macro in Excel. I’ll show you multiple ways to do this,…
Get the Name of a Worksheet in Macros VBA in Excel
Tutorial: How to get the name of a worksheet in Excel using VBA and Macros and also how to store tha…
Highlight, Sort, and Group the Top and Bottom Performers in a List in Excel
Tutorial:
How to highlight the rows of the top and bottom performers in a list of data.
This allows…
Sort Data that Doesn’t Have Headers in Ascending Order in Excel
Macro: Sort data that doesn’t have headers in ascending order in Excel with this macro. This is a…
Loop through a Range of Cells in a UDF in Excel
Tutorial:
How to loop through a range of cells in a UDF, User Defined Function, in Excel. This is …
Subscribe for Weekly Tutorials
BONUS: subscribe now to download our Top Tutorials Ebook!
![]()
Excel VBA Course — From Beginner to Expert
200+ Video Lessons
50+ Hours of Video
200+ Excel Guides
Become a master of VBA and Macros in Excel and learn how to automate all of your tasks in Excel with this online course. (No VBA experience required.)
View Course