
Удаление любых файлов из кода VBA Excel с помощью оператора Kill и метода DeleteFile объекта FileSystemObject. Знаки подстановки, синтаксис, примеры.
Оператор Kill
Описание
Kill – это оператор, предназначенный для удаления файлов с диска.
Синтаксис
- PathName – это строковое выражение, задающее одно или несколько имен файлов (по шаблону), которые требуется удалить.
Строка PathName может содержать каталоги (папки) и букву диска. Если файл с именем PathName не существует, будет сгенерирована ошибка.
Оператор Kill поддерживает использование знаков подстановки в последнем компоненте параметра PathName (собственное имя файла без пути к нему):
- Звездочка (*) – заменяет любое количество символов или ни одного.
- Вопросительный знак (?) – заменяет один символ или ни одного.
Знаки подстановки позволяют создать шаблон, по которому можно удалить сразу несколько файлов.
Примеры
Пример 1
Удаление одного файла без проверки его существования (в примере — удаление книги Excel):
|
Sub Primer1() On Error Resume Next Kill ThisWorkbook.Path & «Книга1.xlsx» End Sub |
Инструкция On Error Resume Next нужна для того, чтобы корректно завершить программу в том случае, если файла с именем PathName не существует.
Пример 2
Удаление одного файла с проверкой его существования:
|
Sub Primer2() Dim myPathName As String myPathName = «C:Новая папкаФайл1.docx» If Dir(myPathName) <> «» Then Kill myPathName End Sub |
Пример 3
Удаление нескольких файлов по шаблону:
|
Sub Primer3() On Error Resume Next Kill «C:Новая папкаСправка*» End Sub |
В результате работы этого кода VBA Excel будут удалены все файлы с любыми расширениями, которые начинаются со слова «Справка». Если строку Kill "C:Новая папкаСправка*" заменить строкой Kill "C:Новая папка*2020*", она удалит все файлы, в имени которых есть подстрока «2020».
Как удалить объект ThisWorkbook с помощью оператора Kill из кода VBA Excel, размещенного в нем же, смотрите в статье: Удаление книги из собственного кода.
Метод DeleteFile
Описание
DeleteFile – это метод объекта FileSystemObject, предназначенный для удаления файлов с диска из кода VBA Excel.
Синтаксис
|
Object.DeleteFile PathName, [force] |
- Object – переменная, возвращающая объект FileSystemObject (обязательный параметр);
- PathName – строковое выражение, задающее одно или несколько имен файлов (по шаблону), которые требуется удалить (обязательный параметр);
- force – значение типа Boolean: True – удаляются все файлы, False (по умолчанию) – не удаляются файлы с атрибутом «только для чтения» (необязательный параметр).
В последнем компоненте параметра PathName (собственное имя файла без пути к нему) можно использовать знаки подстановки, также, как и для оператора Kill. Если указанный файл не существует, будет сгенерирована ошибка.
Примеры
Пример 4
Удаление одного файла с проверкой его существования:
|
Sub Primer4() Dim fso As Object ‘Присваиваем переменной fso ссылку на новый экземпляр FileSystemObject Set fso = CreateObject(«Scripting.FileSystemObject») ‘Проверяем существование удаляемого файла If Dir(ThisWorkbook.Path & «Изображение.png») <> «» Then ‘Удаляем файл, если он существует fso.DeleteFile ThisWorkbook.Path & «Изображение.png» End If End Sub |
Пример 5
Удаление нескольких или всех файлов по шаблону:
|
Sub Primer5() Dim fso As Object ‘Присваиваем переменной fso ссылку на новый экземпляр FileSystemObject Set fso = CreateObject(«Scripting.FileSystemObject») ‘Завершаем программу, если не существует ни одного файла, подходящего под указанный шаблон On Error Resume Next ‘Удаляем указанный файл (файлы) fso.DeleteFile «C:Новая папка*.docx» End Sub |
В результате работы этого кода VBA Excel из папки «Новая папка» будут удалены все файлы с расширением .docx.
Фразы для контекстного поиска: удаление файла, удаление всех файлов, удаление нескольких книг, удаление всех книг, удаление по шаблону.
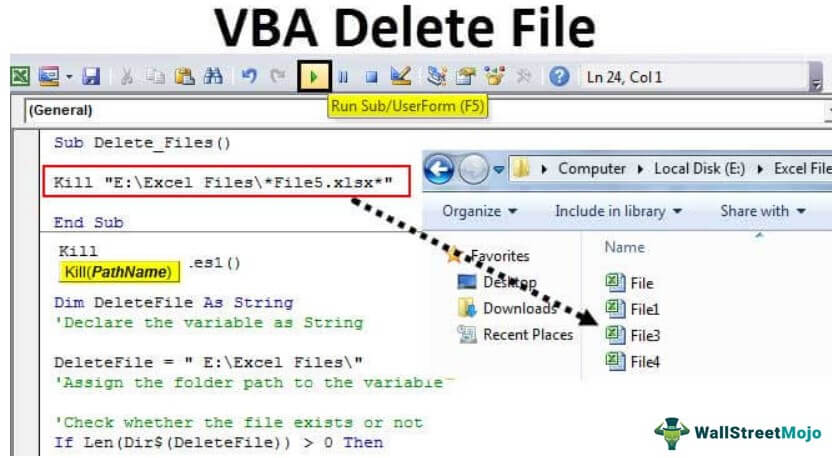
In VBA, we can delete any file present in the computer using VBA codes. The code used to delete files is known as the “Kill” command. The method to delete any file is that first, we must provide the file’s path, which means the file’s location on the computer. Then, we use the “Kill” command to delete the file.
Table of contents
- How to Delete Files using VBA Code?
- Kill Method to Delete Files in a Folder using VBA Code
- Delete Particular File Name
- Delete All Excel Files
- Delete Entire Folder Only
- Delete All the Text Files in the Folder
- Delete Read-Only Files
- Recommended Articles
How to Delete Files using VBA Code?
VBA is a tough thing initially, but as you spend more time with VBA, you will start loving it just like me. We can open files from another computer folder and work with them. Now, we can delete files as well by using VBA coding. This article will show you how to delete files using VBA code in a specific folder.
When working with large projects, we usually create many intermediate files to support our process. we need to delete those files to avoid future confusion after completing the work.
And one scenario is when we usually receive an email. For example, we save attachments for our regular work, or we want to see the report for that point in time, and later we may need to delete those files.
Deleting those files manually may take time, or we may forget to save them. In addition, it will occupy the space on our computer. Therefore, we will show you how to delete those files with simple VBA codesVBA code refers to a set of instructions written by the user in the Visual Basic Applications programming language on a Visual Basic Editor (VBE) to perform a specific task.read more.
You are free to use this image on your website, templates, etc, Please provide us with an attribution linkArticle Link to be Hyperlinked
For eg:
Source: VBA Delete File (wallstreetmojo.com)
Kill Method to Delete Files in a Folder using VBA Code
A simple Kill function will delete the folder, specific file, all Excel files, etc. Take a look at the syntax of the Kill method in VBA. The Kill method cannot delete read-only files.
![]()
Path Name: Pathname is nothing but the folder path in the computer to delete the files.
Note: Path Name can include wildcard characters as well. We can use an asterisk (*) and question marks (?) as wildcard characters in excelIn Excel, wildcards are the three special characters asterisk, question mark, and tilde. Asterisk denotes multiple characters, a question mark denotes a single character, and a tilde denotes the identification of a wild card character.read more.
Asterisk (*) is useful to match any length string. In addition, it also considers zero.
Question mark (?) is useful to match only a single character.
Delete Particular File Name
For example, we have a folder like the one below.
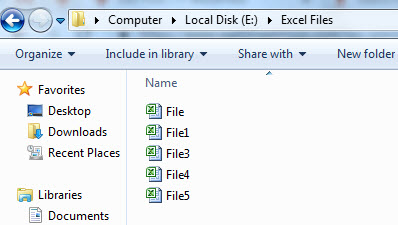
We want to delete the file named “File 5” in this folder. But, first, start the code with the Kill function.
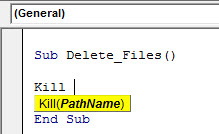
Code:
Sub Delete_Files()

Kill(PathName)

End Sub
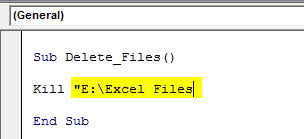
Copy and paste the folder path.
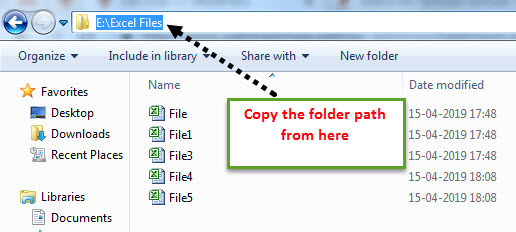
And Paste in double-quotes.
Kill "E:Excel Files"
Now put one more backward slash () and enter the file name with extension.
Kill "E:Excel FilesFile5.xlsx"
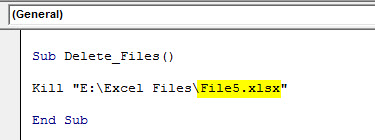
When you run this code, it will delete the file named “File 5.xlsx” in the mentioned folder path.
Delete All Excel Files
Using VBA, we need to use wildcard characters with the Kill function to delete all the Excel files in the folder. After mentioning the folder path, we need to mention the file as “*.xl*.”
Code:
Kill "E:Excel Files*.xl*"
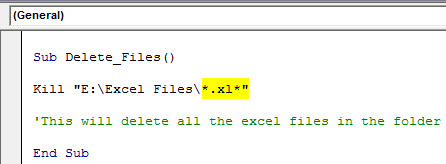
When you run this code, it will delete all the Excel files in the folder.
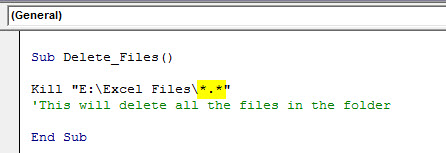
We have seen how we can delete a single Excel file and all the Excel files. But if we want to delete all the files in the folder, how can we delete them? Also, since we are using Excel VBA, can it delete other files?
The answer is Yes! Use the below code to delete all the files in the folder.
Code:
Kill "E:Excel Files*.*"
Delete Entire Folder Only
Is it possible to delete the entire folder itself?
Yes, it is possible.
We need to delete all the files in the folder using the Kill function. Then to delete the folder, we need to use one more function called RmDir.
Code:
RmDir "E:Excel Files"
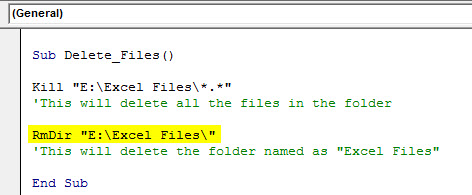
Here RmDir will delete only the empty folder if any subfolder is where it cannot delete them.
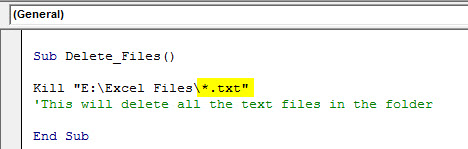
Delete All the Text Files in the Folder
To delete all the text files in the folder, use the below code.
Code:
Kill "E:Excel Files*.txt"
Delete Read-Only Files
As we said, the Kill function cannot delete “Read Only” files in the folder. In such a scenario, we need to use the other two functions: “Dir$” and “SetAttr.” Below is the example code to delete the read-only files as well.
Code:
Sub Delete_Files1()

Dim DeleteFile As String

DeleteFile = " E:Excel Files"

If Len(Dir$(DeleteFile)) > 0 Then

SetAttr DeleteFile, vbNormal

Kill DeleteFile
End If
End Sub

You can download this VBA Delete File Excel Template from here – VBA Delete File Excel Template.
Recommended Articles
This article has been a guide to VBA Delete Files. Here, we discuss the VBA code to delete 1. Particular File Name, 2. All files, 3. Entire folder, and 4. Read-only Files with downloadable Excel template. Below are some useful articles related to VBA: –
- VBA InStr
- VBA Join
- New Line in Excel VBA
- Split Function in Excel VBA
Using VBA, how can I:
- test whether a file exists, and if so,
- delete it?
1.) Check here. Basically do this:
Function FileExists(ByVal FileToTest As String) As Boolean
   FileExists = (Dir(FileToTest) <> "")
End Function
I’ll leave it to you to figure out the various error handling needed but these are among the error handling things I’d be considering:
- Check for an empty string being passed.
- Check for a string containing characters illegal in a file name/path
2.) How To Delete a File. Look at this. Basically use the Kill command but you need to allow for the possibility of a file being read-only. Here’s a function for you:
Sub DeleteFile(ByVal FileToDelete As String)
   If FileExists(FileToDelete) Then 'See above
      ' First remove readonly attribute, if set
      SetAttr FileToDelete, vbNormal
      ' Then delete the file
      Kill FileToDelete
   End If
End Sub
Again, I’ll leave the error handling to you and again these are the things I’d consider:
-
Should this behave differently for a directory vs. a file? Should a user have to explicitly have to indicate they want to delete a directory?
-
Do you want the code to automatically reset the read-only attribute or should the user be given some sort of indication that the read-only attribute is set?
EDIT: Marking this answer as community wiki so anyone can modify it if need be.
2
An alternative way to code Brettski’s answer, with which I otherwise agree entirely, might be
With New FileSystemObject
    If .FileExists(yourFilePath) Then
        .DeleteFile yourFilepath
    End If
End With
Same effect but fewer (well, none at all) variable declarations.
The FileSystemObject is a really useful tool and well worth getting friendly with. Apart from anything else, for text file writing it can actually sometimes be faster than the legacy alternative, which may surprise a few people. (In my experience at least, YMMV).
answered Sep 16, 2008 at 11:03
![]()
Mike WoodhouseMike Woodhouse
51.5k12 gold badges88 silver badges127 bronze badges
4
I’ll probably get flamed for this, but what is the point of testing for existence if you are just going to delete it? One of my major pet peeves is an app throwing an error dialog with something like «Could not delete file, it does not exist!»
On Error Resume Next
aFile = "c:file_to_delete.txt"
Kill aFile
On Error Goto 0
return Len(Dir$(aFile)) > 0 ' Make sure it actually got deleted.
If the file doesn’t exist in the first place, mission accomplished!
answered Sep 15, 2008 at 23:34
![]()
4
The following can be used to test for the existence of a file, and then to delete it.
Dim aFile As String
aFile = "c:file_to_delete.txt"
If Len(Dir$(aFile)) > 0 Then
     Kill aFile
End If
answered Sep 15, 2008 at 23:12
![]()
Rich AdamsRich Adams
25.9k4 gold badges39 silver badges62 bronze badges
2
In VB its normally Dir to find the directory of the file. If it’s not blank then it exists and then use Kill to get rid of the file.
test = Dir(Filename)
If Not test = "" Then
    Kill (Filename)
End If
![]()
ZygD
21k39 gold badges77 silver badges98 bronze badges
answered Sep 15, 2008 at 23:11
![]()
Leo MooreLeo Moore
2,0982 gold badges19 silver badges21 bronze badges
set a reference to the Scripting.Runtime library and then use the FileSystemObject:
Dim fso as New FileSystemObject, aFile as File

if (fso.FileExists("PathToFile")) then
    aFile = fso.GetFile("PathToFile")
    aFile.Delete
End if
answered Sep 15, 2008 at 23:40
![]()
BrettskiBrettski
19.1k15 gold badges75 silver badges95 bronze badges
2
Here’s a tip: are you re-using the file name, or planning to do something that requires the deletion immediately?
No?
You can get VBA to fire the command DEL «C:TEMPscratchpad.txt» /F from the command prompt asynchronously using VBA.Shell:
Shell «DEL » & chr(34) & strPath & chr(34) & » /F «, vbHide
Note the double-quotes (ASCII character 34) around the filename: I’m assuming that you’ve got a network path, or a long file name containing spaces.
If it’s a big file, or it’s on a slow network connection, fire-and-forget is the way to go.
Of course, you never get to see if this worked or not; but you resume your VBA immediately, and there are times when this is better than waiting for the network.
1
You can set a reference to the Scripting.Runtime library and then use the FileSystemObject. It has a DeleteFile method and a FileExists method.
See the MSDN article here.
answered Sep 15, 2008 at 23:12
![]()
Darrel MillerDarrel Miller
138k31 gold badges193 silver badges242 bronze badges
0
A shorter version of the first solution that worked for me:
Sub DeleteFile(ByVal FileToDelete As String)
   If (Dir(FileToDelete) <> "") Then
      ' First remove readonly attribute, if set
      SetAttr FileToDelete, vbNormal
      ' Then delete the file
      Kill FileToDelete
   End If
End Sub
Return to VBA Code Examples
VBA allows you to delete an existing file, using the Kill command. In this tutorial, you will learn how to delete a specific file or multiple files.
If you want to learn how to copy and rename a file, you can click on this link: VBA Copy File
Delete a Single File (or Workbook) in VBA
We will show how to delete the file Sample file 1.xlsx in the folder VBA Folder. The folder with the file now looks like in Image 1:
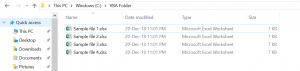
Image 1. Delete a single file
Here is the code which will delete the file:
Kill "C:VBA FolderSample File 1.xlsx"After running the code, the file Sample file 1.xlsx is now deleted from the VBA Folder. The output is in Image 2:
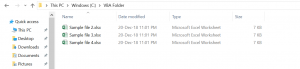
Image 2. File deleted from the C:VBA Folder
Delete All Excel Files From the Folder
The same command enables you to delete all Excel files from the folder. You just need to put an asterisk (*) instead of the file name. An asterisk replaces any string. Here is the code:
Kill "C:VBA Folder*.xlsx"As you can see in Image 3, all Excel files from Folder VBA are deleted:
Image 3. Delete all Excel files from the C:VBA Folder
VBA Coding Made Easy
Stop searching for VBA code online. Learn more about AutoMacro — A VBA Code Builder that allows beginners to code procedures from scratch with minimal coding knowledge and with many time-saving features for all users!

Learn More!
Содержание:
- Удалите все макросы, сохранив файл в формате XLSX
- Удалить определенные макросы из диалогового окна «Макрос»
- Удалите модуль с макросом
[lyte id=’lyNJbZfM7TU’ /]
Использование макросов VBA в Excel может значительно сэкономить время. Вы можете автоматизировать множество повторяющихся задач и создавать новые функции и возможности в Excel с помощью простых кодов макросов VBA.
Но в некоторых случаях вам может потребоваться удалить все макросы из книги Excel (или удалить только определенные макросы).
Это может быть в том случае, если вы получаете книгу от кого-то другого и хотите освободить ее от макросов, или когда вы отправляете кому-то файл с макросами, а квитанция не нуждается в них в книге.
В этом уроке я покажу вам несколько действительно простых способов удалить макросы из книги в Microsoft Excel.
Итак, приступим!
Удалите все макросы, сохранив файл в формате XLSX
Если вы хотите избавиться от всех макросов сразу, самый простой способ сделать это — сохранить существующую книгу в формате XLSX.
По умолчанию у вас не может быть кода макроса VBA в формате файла XLSX. Если вы это сделаете, он будет автоматически удален при сохранении файла Excel.
В Excel вы можете использовать макросы только в форматах .XLSM, .XLSB и более старых форматах .XLS. Когда вы сохраняете книгу в любом другом формате, макросы сразу теряются.
Предположим, у вас есть файл с именем Example.xlsm (с макросами), ниже приведены шаги по удалению всех макросов из этого файла:
- Перейдите на вкладку Файл.

- Нажмите на опцию «Сохранить как» (в новых версиях Excel это «Сохранить копию»).
- Щелкните Обзор. Откроется диалоговое окно «Сохранить как».
- В диалоговом окне «Сохранить как» введите имя файла, с которым вы хотите его сохранить. Вы также можете сохранить существующее имя, если хотите
- Щелкните раскрывающийся список Тип файла.
- Выберите вариант «Книга Excel (* .xlsx)».
- Нажмите на Сохранить
- В появившемся запросе нажмите Да. Он просто информирует вас о том, что код VB будет утерян, если вы сохраните этот файл в формате .XLSX.


Вот и все! Теперь ваш файл не содержит макросов.
Этот метод удобен тем, что удаляет все макросы из текущей книги Excel за один раз. Однако, если вы хотите удалить некоторые макросы и удалить некоторые, этот метод не сработает для вас (см. Тот, который использует диалоговое окно «Макрос» для этого).
Еще одна хорошая особенность этого метода заключается в том, что у вас все еще есть копия исходного файла со всеми макросами (на случай, если она вам понадобится в будущем).
Удалить определенные макросы из диалогового окна «Макрос»
Хотя предыдущий метод удалял все макросы. это позволяет вам выбрать те, которые вы хотите удалить.
И если вы хотите удалить все макросы, вы также можете это сделать.
Предположим, у вас есть файл с именем Example.xlsm, в котором есть несколько макросов.
Ниже приведены шаги по удалению макроса из этой книги:
- Перейдите на вкладку Разработчик (если вы не видите вкладку Разработчик, обратите внимание на примечание желтого цвета после шагов)
- Щелкните по кнопке Macros. Откроется диалоговое окно «Макрос», в котором вы увидите все макросы в книге.
- Убедитесь, что в раскрывающемся списке «Макросы в» выбрана «Эта книга».
- Выберите имя макроса, который вы хотите удалить, из списка макросов.
- Щелкните по кнопке Удалить. Это удалит выбранный макрос


Если вы хотите удалить несколько (или все) макросов, повторите шаги 4 и 5.
Примечание. Если вы не видите вкладку разработчика, нажмите здесь, чтобы узнать, как отобразить вкладку разработчика на ленте в Excel. Кроме того, вы также можете использовать сочетание клавиш — ALT + 8, чтобы открыть диалоговое окно «Макрос».
Кроме того, вы также можете щелкнуть вкладку «Представления», щелкнуть раскрывающийся список «Макросы» и затем выбрать опцию «Просмотр макросов». Это также откроет диалоговое окно Macros.
Хотя этот метод отлично работает, он позволяет удалять только макросы, которые хранятся в модуле редактора Visual Basic. Если у вас есть макросы событий (в определенных листах или ThisWorkbook) или макросы в личной книге макросов, их нельзя удалить с помощью этого метода.
Удалите модуль с макросом
Другой способ удалить макросы — перейти в редактор Visual Basic и удалить оттуда макросы.
Этот метод дает вам наибольший контроль, поскольку вы можете получить доступ ко всем макросам (будь то в модуле, объектах или личной книге макросов).
Ниже приведены шаги по удалению макроса из редактора Visual Basic:
- Щелкните вкладку Разработчик на ленте.
- Нажмите на опцию Visual Basic (или воспользуйтесь сочетанием клавиш — ALT + F11)
- В редакторе VB у вас будут все объекты книги в Project Explorer. Если вы не видите Project Explorer, выберите опцию View в меню, а затем нажмите Project Explorer.
- В Project Explorer дважды щелкните объект с кодом макроса. Это может быть модуль, объект рабочего листа или ThisWorkbook.
- В открывшемся окне кода удалите макросы, которые хотите удалить. Если вы хотите удалить все, просто выберите все и нажмите клавишу удаления.


Если у вас есть модуль, который имеет код, который вы хотите удалить, вы можете щелкнуть правой кнопкой мыши объект модуля, а затем выбрать опцию «Удалить модуль».

Итак, это три способа удаления макросов из книги Microsoft Excel.
Надеюсь, вы нашли этот урок полезным!