
Открытие книги Excel из кода VBA. Проверка существования книги. Создание новой книги, обращение к открытой книге и ее закрытие. Методы Open, Add и Close.
Открытие существующей книги
Существующая книга открывается из кода VBA Excel с помощью метода Open:
|
Workbooks.Open Filename:=«D:test1.xls» |
или
|
Workbooks.Open («D:test1.xls») |
В кавычках указывается полный путь к открываемому файлу Excel. Если такой файл не существует, произойдет ошибка.
Проверка существования файла
Проверить существование файла можно с помощью функции Dir. Проверка существования книги Excel:
|
If Dir(«D:test1.xls») = «» Then MsgBox «Файл не существует» Else MsgBox «Файл существует» End If |
Или, если файл (книга Excel) существует, можно сразу его открыть:
|
If Dir(«D:test1.xls») = «» Then MsgBox «Файл не существует» Else Workbooks.Open Filename:=«D:test1.xls» End If |
Создание новой книги
Новая рабочая книга Excel создается в VBA с помощью метода Add:
Созданную книгу, если она не будет использоваться как временная, лучше сразу сохранить:
|
Workbooks.Add ActiveWorkbook.SaveAs Filename:=«D:test2.xls» |
В кавычках указывается полный путь сохраняемого файла Excel, включая присваиваемое имя, в примере — это «test2.xls».
Обращение к открытой книге
Обращение к активной книге:
Обращение к книге с выполняемым кодом:
Обращение к книге по имени:
|
Workbooks(«test1.xls») Workbooks(«test2.xls») |
Обратиться по имени можно только к уже открытой книге, а чтобы из кода VBA Excel книгу открыть, необходимо указать полный путь к файлу.
Открытая рабочая книга закрывается из кода VBA Excel с помощью метода Close:
|
Workbooks(«test1.xlsx»).Close |
Если закрываемая книга редактировалась, а внесенные изменения не были сохранены, тогда при ее закрытии Excel отобразит диалоговое окно с вопросом: Вы хотите сохранить изменения в файле test1.xlsx? Чтобы файл был закрыт без сохранения изменений и вывода диалогового окна, можно воспользоваться параметром метода Close — SaveChanges:
|
Workbooks(«test1.xlsx»).Close SaveChanges:=False |
или
|
Workbooks(«test1.xlsx»).Close (False) |
Закрыть книгу Excel из кода VBA с сохранением внесенных изменений можно также с помощью параметра SaveChanges:
|
Workbooks(«test1.xlsx»).Close SaveChanges:=True |
или
|
Workbooks(«test1.xlsx»).Close (True) |
Фразы для контекстного поиска: открыть книгу, открытие книги, создать книгу, создание книги, закрыть книгу, закрытие книги, открыть файл Excel, открытие файла Excel, существование книги, обратиться к открытой книге.
In this Article
- The Workbook Object
- Workbook Index Number
- Activate Workbook, ActiveWorkbook, and ThisWorkbook
- Activate Workbook
- ActiveWorkbook
- ThisWorkbook
- Open Workbook
- Open and Assign to Variable
- Open File Dialog
- Create New (Add) Workbook
- Add New Workbook to Variable
- Close Workbook
- Close & Save
- Close without Save
- Workbook Save As
- Other Workbook VBA Examples
- Workbook Name
- Protect Workbook
- Loop Through all Open Workbooks
- Workbook Activate Event
This guide will introduce you working with the Workbook Object in VBA.
The Workbook Object
First, in order to interact with workbooks in VBA, you must understand the Workbook Object.
With the workbook object, you can reference workbooks by their name like this:
Workbooks("Book2.xlsm").ActivateHowever, this code will only work if the workbook is open. If the workbook is closed, you will need to provide the full workbook path:
Workbooks.Open ("C:UsersStevePC2Downloadsbook2.xlsm")Instead of typing out the full path, if your desired workbook is in the same directory as the workbook where your code is stored, you could use this line code to open the workbook:
Workbooks.Open (ThisWorkbook.Path & "book2.xlsm")This makes use of the ThisWorkbook object that we will discuss in the next section.
Workbook Index Number
Last, you can reference workbooks by their “Index Number”. The index number of a workbook corresponds to the order that the workbook was opened (technically its the workbook’s position in the Workbooks Collection).
Workbooks(1).ActivateThis is useful if you want to do something like close the first (or last) opened workbook.
Activate Workbook, ActiveWorkbook, and ThisWorkbook
If a workbook is NOT ACTIVE, you can access the Workbook’s objects like this:
Workbooks("Book2.xlsm").Sheets("Sheet1").Range("A1").value = 1However, if the workbook is Active, you can omit the workbook object:
Sheets("Sheet1").Range("A1").value = 1And if you want to interact with the workbook’s active sheet, you can also ommit the sheets object:
Range("A1").value = 1Activate Workbook
To activate a workbook, use the Activate Method.
Workbooks("Book2.xlsm").ActivateNow you can interact with Book2’s object’s without explicitly stating the workbook name.
ActiveWorkbook
The ActiveWorkbook object always refer to the active workbook. This is useful if you’d like to assign the ActiveWorkbook to a variable to use later.
Dim wb As Workbook
Set wb = ActiveWorkbook
ThisWorkbook
The ThisWorkbook object always refers to the workbook where the running code is stored. To activate ThisWorkbook, use this line of code:
ThisWorkbook.ActivateVBA Coding Made Easy
Stop searching for VBA code online. Learn more about AutoMacro — A VBA Code Builder that allows beginners to code procedures from scratch with minimal coding knowledge and with many time-saving features for all users!

Learn More
Open Workbook
To open a workbook, use the Open Method:
Workbooks.Open ("C:UsersStevePC2Downloadsbook2.xlsm")The newly opened workbook will always become the ActiveWorkbook, allowing you to easily interact with it.
ActiveWorkbook.SaveThe Open Method has several other arguments, allowing you to open read-only, open a password-protected workbook, and more. It’s covered here in our article about Opening / Closing Workbooks.
Open and Assign to Variable
You can also open a workbook and assign it to a variable at the same time:
Dim wb As Workbook
Set wb = Workbooks.Open("C:UsersStevePC2Downloadsbook2.xlsm")
Open File Dialog
You can also trigger the Open File Dialog Box like this:
Sub OpenWorkbook ()

    Dim strFile As String

    strFile = Application.GetOpenFilename()
    Workbooks.Open (strFile)

End Sub
VBA Programming | Code Generator does work for you!
Create New (Add) Workbook
This line of code will create a new workbook:
Workbooks.AddThe new workbook now becomes the ActiveWorkbook, allowing you to interact with it (ex. save the new workbook).
Add New Workbook to Variable
You can also add a new workbook directly to a variable:
Dim wb As Workbook
Set wb = Workbooks.Add
Close Workbook
Close & Save
To close a workbook with saving, use the Close Method with SaveChanges set to TRUE:
ActiveWorkbook.Close SaveChanges:=TrueClose without Save
To close without saving, set SaveChanges equal to FALSE:
ActiveWorkbook.Close SaveChanges:=FalseAutoMacro | Ultimate VBA Add-in | Click for Free Trial!
Workbook Save As
The SaveAs Method is used to save a workbook as.
To save a workbook with a new name, in the same directory, you can imply use this:
ActiveWorkbook.SaveAs "new"where “new” is the new file name.
To save a workbook in a new directory with a specific file extension, simply specify the new directory and file name:
ActiveWorkbook.SaveAs "C:UsersStevePC2Downloadsnew.xlsm"Other Workbook VBA Examples
Workbook Name
To get the name of a workbook:
MsgBox ActiveWorkbook.NameProtect Workbook
To protect the workbook structure from editing, you can use the Protect Method (password optional):
Workbooks("book1.xlsm").Protect "password"To unprotect a workbook use the UnProtect Method:
Workbooks("book1.xlsm").Unprotect "password"AutoMacro | Ultimate VBA Add-in | Click for Free Trial!
Loop Through all Open Workbooks
To loop through all open workbooks:
Sub LoopThroughWBs()

    Dim wb As Workbook

    For Each wb In Workbooks
        MsgBox wb.Name
    Next wb

End Sub
Workbook Activate Event
You can run some code whenever a specific workbook is opened with the Workbook Open Event.
Place this procedure your workbook’s ThisWorkbook Module:
Private Sub Workbook_Open()
    Sheets("sheet1").Activate
End Sub
This procedure will activate Sheet1 every time the workbook is opened.
In Excel, a workbook is one of the most important of all the Excel Objects, and it is also essential to understand how to use and refer to workbooks while writing VBA codes.
In this tutorial, we will explore all the things that you need to know. But, the first thing you need to understand are objects that are involved in using workbooks in VBA.
Objects you need to know:
- Workbooks Object
- Workbook Object
Both of these objects sound the same, but there’s a core difference between both of them.
Workbooks Object
In VBA, the workbooks object represents the collection of the workbooks that are open in Microsoft Excel. Imagine you have ten workbooks open at the same time. And you want to refer to the one workbook out of them. In that case, you need to use the workbook object to refer to that one workbook using its name.

Workbook Object
In VBA, the workbook object represents one single workbook from the entire collection of workbooks open at present in Microsoft Excel. The best way to understand this is to think about declaring a variable as a workbook that you want to use to refer to a particular workbook in the code.

Useful Links: Add Developer Tab | Visual Basic Editor | Run a Macro | Personal Macro Workbook
To work with workbooks in VBA, the first thing that you need to know is how to refer to a workbook in a macro. Here’s the happy thing: there are multiple ways to refer to a workbook. And ahead, we will explore each one of them.
1. By Name
The easiest way to refer to a workbook is to use its name. Let’s say you want to activate the workbook Book1.xlsx, in that case, the code that you need to use should be like the following:

Referring to a workbook with its name is quite simple, you need to specify the name, and that’s it. But here’s one thing that you need to take care of: if a workbook is not saved, then you need to use only the name. And if saved, then you need to use the name along with the extension.
2. By Number
When you open a workbook, Excel gives an index number to that workbook, and you can use that number to refer to a workbook. The workbook that you have opened at first will have the index number “1” and the second will have “2” and so on.

This method might seem less real to you as it’s hard to know which workbook is on which index number. But there’s one situation where this method is quite useful to use, and that’s looping through all the open workbooks.
3. By ThisWorkbook
This workbook is a property that helps you to refer to the workbook where you are writing the code. Let’s say you are writing the code in “Book1” and use the ThisWorkbook to save the workbook. Now even when you change the name of the workbook, you won’t need to change the code.

The above code counts the number of sheets in the workbook where this code is written and shows a message box with the result.
4. By ActiveWorkbook
If you want to refer to a workbook that is active, then you need to use the “ActiveWorkbook” property. The best use of this property is when you are sure which workbook is activated now. Or you have already activated the workbook that you want to work.

The above code activates the workbook “Book1” first and then uses the active workbook property to save and close the active workbook.
Access all the Methods and Properties
In VBA, whenever you refer to an object, VBA allows you to access the properties and methods that come with that object. In the same way, the workbook object comes with properties and methods. To access them, you need to define the workbook first and then enter a dot.

The moment you type a dot (.), it shows the list of properties and methods. Now, you must have a question in your mind about how to identify which one is a property and which one is a method.
Here’s the trick. If you look closely, you can identify a moving green brick and grey hand before each name on the list. So, all the properties have that grey hand before the name and methods have a moving green brick.
For example to use a Method with Workbook
Imagine you want to close a workbook (which is a method), you need to type or select “Close” from the list.

After that, you need to enter starting parentheses to get the IntelliSense to know the arguments you need to define.

With the close method, there are three arguments that you need to define, and as you can see, all these arguments are optional, and you can skip them if you want. But some methods don’t have arguments (for example: activate)
For example to use a Property with Workbook
Imagine you want to count the sheets from the workbook “book1” in that case, you need to use the “Sheets” property and then the further count property of it.

In the above code, as I said, you have book1 defined, and then the sheet property refers to all the sheets, and then the count property to count them. And when you run this code, it shows you a message box with the result.
Using “WITH” Statement with Workbook
In VBA, there’s a “With” statement that can help you work with a workbook while writing a macro efficiently. Let’s see the below example where you have three different code lines with the same workbook, i.e., ActiveWorkbook.

With the “WITH statement”, you can refer to the active workbook a single time, and use all the properties and methods that you have in the code.
- First of all, you need to start with the starting statement “With ActiveWorkbook” and end the statement with “End With”.

- After that, you need to write the code between this statement that you have in the above example.

As you can see in the above code we have referred to the ActiveWorkbook one using the WITH statement, and then all the properties and methods need to be used.
Sub vba_activeworkbook_with_statement()
With ActiveWorkbook
    .Sheets.Add Count:=5
    .Charts.Visible = False
    .SaveAs ("C:UsersDellDesktopmyFolderbook2.xlsx")
End With
End Sub
Let me tell you a simple real-life example to make you understand everything. Imagine you ask me to go to room 215 to get the water bottle, and when I come back, you again send me to room 215 to get a pen, and then again send me back to get a laptop. Now here’s the thing: All the things that you told me to get are in room 215. So better if you sent me to room 215 and told me to get all three things at once.
Read: With – End With
Declaring a Variable as a Workbook
Sometimes you need to declare a variable as a workbook to use it further in the code. Well, this doesn’t require anything special for you to do.

- Use the DIM Statement (Declare).
- Write the name of the Variable.
- Define the type of the variable as Workbook.
Dealing with Errors
When you work with a workbook(s) object in VBA, there are chances that you need to deal with errors as well. Take an example of the “Run-time Error 9: Subscript out of Range” error. This error can occur for various reasons.
- The workbook that you are trying to refer to is not opened.
- Might be you have misspelled the name.
- The workbook you are referring to is not yet saved and you are using the extension along with the name.
- If you are using the index number to refer to a workbook and the number you have used is greater than the total number of workbooks open.
| title | keywords | f1_keywords | ms.prod | api_name | ms.assetid | ms.date | ms.localizationpriority |
|---|---|---|---|---|---|---|---|
|
Workbooks.Open method (Excel) |
vbaxl10.chm203082 |
vbaxl10.chm203082 |
excel |
Excel.Workbooks.Open |
1d1c3fca-ae1a-0a91-65a2-6f3f0fb308a0 |
08/14/2019 |
medium |
Workbooks.Open method (Excel)
Opens a workbook.
[!includeAdd-ins note]
Syntax
expression.Open (FileName, UpdateLinks, ReadOnly, Format, Password, WriteResPassword, IgnoreReadOnlyRecommended, Origin, Delimiter, Editable, Notify, Converter, AddToMru, Local, CorruptLoad)
expression A variable that represents a Workbooks object.
Parameters
| Name | Required/Optional | Data type | Description |
|---|---|---|---|
| FileName | Optional | Variant | String. The file name of the workbook to be opened. |
| UpdateLinks | Optional | Variant | Specifies the way external references (links) in the file, such as the reference to a range in the Budget.xls workbook in the following formula =SUM([Budget.xls]Annual!C10:C25), are updated. If this argument is omitted, the user is prompted to specify how links will be updated. For more information about the values used by this parameter, see the Remarks section.
If Microsoft Excel is opening a file in the WKS, WK1, or WK3 format and the UpdateLinks argument is 0, no charts are created; otherwise, Microsoft Excel generates charts from the graphs attached to the file. |
| ReadOnly | Optional | Variant | True to open the workbook in read-only mode. |
| Format | Optional | Variant | If Microsoft Excel opens a text file, this argument specifies the delimiter character. If this argument is omitted, the current delimiter is used. For more information about the values used by this parameter, see the Remarks section. |
| Password | Optional | Variant | A string that contains the password required to open a protected workbook. If this argument is omitted and the workbook requires a password, the user is prompted for the password. |
| WriteResPassword | Optional | Variant | A string that contains the password required to write to a write-reserved workbook. If this argument is omitted and the workbook requires a password, the user will be prompted for the password. |
| IgnoreReadOnlyRecommended | Optional | Variant | True to have Microsoft Excel not display the read-only recommended message (if the workbook was saved with the Read-Only Recommended option). |
| Origin | Optional | Variant | If the file is a text file, this argument indicates where it originated, so that code pages and Carriage Return/Line Feed (CR/LF) can be mapped correctly. Can be one of the following XlPlatform constants: xlMacintosh, xlWindows, or xlMSDOS. If this argument is omitted, the current operating system is used. |
| Delimiter | Optional | Variant | If the file is a text file and the Format argument is 6, this argument is a string that specifies the character to be used as the delimiter. For example, use Chr(9) for tabs, use «,» for commas, use «;» for semicolons, or use a custom character. Only the first character of the string is used. |
| Editable | Optional | Variant | If the file is a Microsoft Excel 4.0 add-in, this argument is True to open the add-in so that it is a visible window. If this argument is False or omitted, the add-in is opened as hidden, and it cannot be unhidden. This option does not apply to add-ins created in Microsoft Excel 5.0 or later.
If the file is an Excel template, True to open the specified template for editing. False to open a new workbook based on the specified template. The default value is False. |
| Notify | Optional | Variant | If the file cannot be opened in read/write mode, this argument is True to add the file to the file notification list. Microsoft Excel will open the file as read-only, poll the file notification list, and then notify the user when the file becomes available. If this argument is False or omitted, no notification is requested, and any attempts to open an unavailable file will fail. |
| Converter | Optional | Variant | The index of the first file converter to try when opening the file. The specified file converter is tried first; if this converter does not recognize the file, all other converters are tried. The converter index consists of the row numbers of the converters returned by the FileConverters property. |
| AddToMru | Optional | Variant | True to add this workbook to the list of recently used files. The default value is False. |
| Local | Optional | Variant | True saves files against the language of Microsoft Excel (including control panel settings). False (default) saves files against the language of Visual Basic for Applications (VBA) (which is typically United States English unless the VBA project where Workbooks.Open is run from is an old internationalized XL5/95 VBA project). |
| CorruptLoad | Optional | XlCorruptLoad | Can be one of the following constants: xlNormalLoad, xlRepairFile and xlExtractData. The default behavior if no value is specified is xlNormalLoad, and does not attempt recovery when initiated through the OM. |
Return value
A Workbook object that represents the opened workbook.
Remarks
By default, macros are enabled when opening files programmatically. Use the AutomationSecurity property to set the macro security mode used when opening files programmatically.
You can specify one of the following values in the UpdateLinks parameter to determine whether external references (links) are updated when the workbook is opened.
| Value | Description |
|---|---|
| 0 | External references (links) will not be updated when the workbook is opened. |
| 3 | External references (links) will be updated when the workbook is opened. |
You can specify one of the following values in the Format parameter to determine the delimiter character for the file.
| Value | Delimiter |
|---|---|
| 1 | Tabs |
| 2 | Commas |
| 3 | Spaces |
| 4 | Semicolons |
| 5 | Nothing |
| 6 | Custom character (see the Delimiter argument) |
Example
The following code example opens the workbook Analysis.xls and then runs its Auto_Open macro.
Workbooks.Open "ANALYSIS.XLS"
ActiveWorkbook.RunAutoMacros xlAutoOpen
The following code example imports a sheet from another workbook onto a new sheet in the current workbook. Sheet1 in the current workbook must contain the path name of the workbook to import in cell D3, the file name in cell D4, and the worksheet name in cell D5. The imported worksheet is inserted after Sheet1 in the current workbook.
Sub ImportWorksheet()
    ' This macro will import a file into this workbook
    Sheets("Sheet1").Select
    PathName = Range("D3").Value
    Filename = Range("D4").Value
    TabName = Range("D5").Value
    ControlFile = ActiveWorkbook.Name
    Workbooks.Open Filename:=PathName & Filename
    ActiveSheet.Name = TabName
    Sheets(TabName).Copy After:=Workbooks(ControlFile).Sheets(1)
    Windows(Filename).Activate
    ActiveWorkbook.Close SaveChanges:=False
    Windows(ControlFile).Activate
End Sub
[!includeSupport and feedback]
In this tutorial, I will cover the how to work with workbooks in Excel using VBA.
In Excel, a ‘Workbook’ is an object that is a part of the ‘Workbooks’ collection. Within a workbook, you have different objects such as worksheets, chart sheets, cells and ranges, chart objects, shapes, etc.
With VBA, you can do a lot of stuff with a workbook object – such as open a specific workbook, save and close workbooks, create new workbooks, change the workbook properties, etc.
So let’s get started.
If you’re interested in learning VBA the easy way, check out my Online Excel VBA Training.
Referencing a Workbook using VBA
There are different ways to refer to a Workbook object in VBA.
The method you choose would depend on what you want to get done.
In this section, I will cover the different ways to refer to a workbook along with some example codes.
Using Workbook Names
If you have the exact name of the workbook that you want to refer to, you can use the name in the code.
Let’s begin with a simple example.
If you have two workbooks open, and you want to activate the workbook with the name – Examples.xlsx, you can use the below code:
Sub ActivateWorkbook()
Workbooks("Examples.xlsx").Activate
End Sub
Note that you need to use the file name along with the extension if the file has been saved. If it hasn’t been saved, then you can use the name without the file extension.
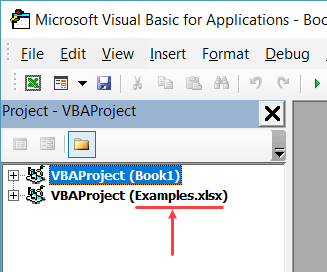
If you’re not sure what name to use, take help from the Project Explorer.
If you want to activate a workbook and select a specific cell in a worksheet in that workbook, you need to give the entire address of the cell (including the Workbook and the Worksheet name).
Sub ActivateWorkbook()
Workbooks("Examples.xlsx").Worksheets("Sheet1").Activate
Range("A1").Select
End Sub
The above code first activates Sheet1 in the Examples.xlsx workbook and then selects cell A1 in the sheet.
You will often see a code where a reference to a worksheet or a cell/range is made without referring to the workbook. This happens when you’re referring to the worksheet/ranges in the same workbook that has the code in it and is also the active workbook. However, in some cases, you do need to specify the workbook to make sure the code works (more on this in the ThisWorkbook section).
Using Index Numbers
You can also refer to the workbooks based on their index number.
For example, if you have three workbooks open, the following code would show you the names of the three workbooks in a message box (one at a time).
Sub WorkbookName()
MsgBox Workbooks(1).Name
MsgBox Workbooks(2).Name
MsgBox Workbooks(3).Name
End Sub
The above code uses MsgBox – which is a function that shows a message box with the specified text/value (which is the workbook name in this case).
One of the troubles I often have with using index numbers with Workbooks is that you never know which one is the first workbook and which one is the second and so on. To be sure, you would have to run the code as shown above or something similar to loop through the open workbooks and know their index number.
Excel treats the workbook opened first to have the index number as 1, and the next one as 2 and so on.
Despite this drawback, using index numbers can come in handy.
For example, if you want to loop through all the open workbooks and save all, you can use the index numbers.
In this case, since you want this to happen to all the workbooks, you’re not concerned about their individual index numbers.
The below code would loop through all the open workbooks and close all except the workbook that has this VBA code.
Sub CloseWorkbooks()
Dim WbCount As Integer
WbCount = Workbooks.Count
For i = WbCount To 1 Step -1
If Workbooks(i).Name <> ThisWorkbook.Name Then
Workbooks(i).Close
End If
Next i
End Sub
The above code counts the number of open workbooks and then goes through all the workbooks using the For Each loop.
It uses the IF condition to check if the name of the workbook is the same as that of the workbook where the code is being run.
If it’s not a match, it closes the workbook and moves to the next one.
Note that we have run the loop from WbCount to 1 with a Step of -1. This is done as with each loop, the number of open workbooks is decreasing.
ThisWorkbook is covered in detail in the later section.
Also read: How to Open Excel Files Using VBA (Examples)
Using ActiveWorkbook
ActiveWorkbook, as the name suggests, refers to the workbook that is active.
The below code would show you the name of the active workbook.
Sub ActiveWorkbookName()
MsgBox ActiveWorkbook.Name
End Sub
When you use VBA to activate another workbook, the ActiveWorkbook part in the VBA after that would start referring to the activated workbook.
Here is an example of this.
If you have a workbook active and you insert the following code into it and run it, it would first show the name of the workbook that has the code and then the name of Examples.xlsx (which gets activated by the code).
Sub ActiveWorkbookName()
MsgBox ActiveWorkbook.Name
Workbooks("Examples.xlsx").Activate
MsgBox ActiveWorkbook.Name
End Sub
Note that when you create a new workbook using VBA, that newly created workbook automatically becomes the active workbook.
Using ThisWorkbook
ThisWorkbook refers to the workbook where the code is being executed.
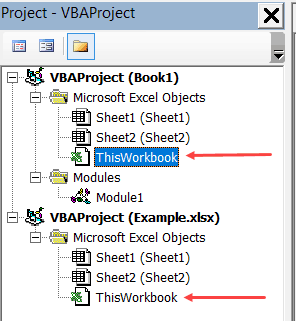
Every workbook would have a ThisWorkbook object as a part of it (visible in the Project Explorer).
‘ThisWorkbook’ can store regular macros (similar to the ones that we add-in modules) as well as event procedures. An event procedure is something that is triggered based on an event – such as double-clicking on a cell, or saving a workbook or activating a worksheet.
Any event procedure that you save in this ‘ThisWorkbook’ would be available in the entire workbook, as compared to the sheet level events which are restricted to the specific sheets only.
For example, if you double-click on the ThisWorkbook object in the Project Explorer and copy-paste the below code in it, it will show the cell address whenever you double-click on any of the cells in the entire workbook.
Private Sub Workbook_SheetBeforeDoubleClick(ByVal Sh As Object, ByVal Target As Range, Cancel As Boolean)
MsgBox Target.Address
End Sub
While ThisWorkbook’s main role is to store event procedure, you can also use it to refer to the workbook where the code is being executed.
The below code would return the name of the workbook in which the code is being executed.
Sub ThisWorkbookName()
MsgBox ThisWorkbook.Name
End Sub
The benefit of using ThisWorkbook (over ActiveWorkbook) is that it would refer to the same workbook (the one that has the code in it) in all the cases. So if you use a VBA code to add a new workbook, the ActiveWorkbook would change, but ThisWorkbook would still refer to the one that has the code.
Creating a New Workbook Object
The following code will create a new workbook.
Sub CreateNewWorkbook()
Workbooks.Add
End Sub
When you add a new workbook, it becomes the active workbook.
The following code will add a new workbook and then show you the name of that workbook (which would be the default Book1 type name).
Sub CreateNewWorkbook()
Workbooks.Add
MsgBox ActiveWorkbook.Name
End Sub
Open a Workbook using VBA
You can use VBA to open a specific workbook when you know the file path of the workbook.
The below code will open the workbook – Examples.xlsx which is in the Documents folder on my system.
Sub OpenWorkbook()
Workbooks.Open ("C:UserssumitDocumentsExamples.xlsx")
End Sub
In case the file exists in the default folder, which is the folder where VBA saves new files by default, then you can just specify the workbook name – without the entire path.
Sub OpenWorkbook()
Workbooks.Open ("Examples.xlsx")
End Sub
In case the workbook that you’re trying to open doesn’t exist, you’ll see an error.
To avoid this error, you can add a few lines to your code to first check whether the file exists or not and if it exists then try to open it.
The below code would check the file location and if it doesn’t exist, it will show a custom message (not the error message):
Sub OpenWorkbook()
If Dir("C:UserssumitDocumentsExamples.xlsx") <> "" Then
Workbooks.Open ("C:UserssumitDocumentsExamples.xlsx")
Else
MsgBox "The file doesn't exist"
End If
End Sub
You can also use the Open dialog box to select the file that you want to open.
Sub OpenWorkbook()
If Dir("C:UserssumitDocumentsExamples.xlsx") <> "" Then
Workbooks.Open ("C:UserssumitDocumentsExamples.xlsx")
Else
MsgBox "The file doesn't exist"
End If
End Sub
The above code opens the Open dialog box. When you select a file that you want to open, it assigns the file path to the FilePath variable. Workbooks.Open then uses the file path to open the file.
In case the user doesn’t open a file and clicks on Cancel button, FilePath becomes False. To avoid getting an error in this case, we have used the ‘On Error Resume Next’ statement.
Saving a Workbook
To save the active workbook, use the code below:
Sub SaveWorkbook()
ActiveWorkbook.Save
End Sub
This code works for the workbooks that have already been saved earlier. Also, since the workbook contains the above macro, if it hasn’t been saved as a .xlsm (or .xls) file, you will lose the macro when you open it next.
If you’re saving the workbook for the first time, it will show you a prompt as shown below:
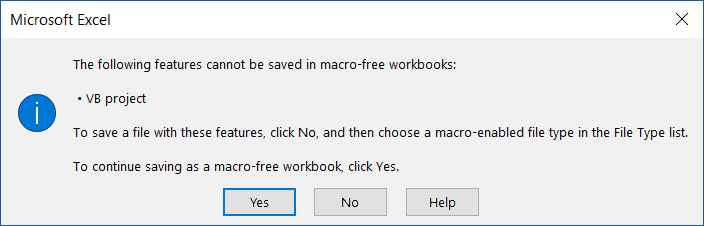
When saving for the first time, it’s better to use the ‘Saveas’ option.
The below code would save the active workbook as a .xlsm file in the default location (which is the document folder in my system).
Sub SaveWorkbook()
ActiveWorkbook.SaveAs Filename:="Test.xlsm", FileFormat:=xlOpenXMLWorkbookMacroEnabled
End Sub
If you want the file to be saved in a specific location, you need to mention that in the Filename value. The below code saves the file on my desktop.
Sub SaveWorkbook()
ActiveWorkbook.SaveAs Filename:="C:UserssumitDesktopTest.xlsm", FileFormat:=xlOpenXMLWorkbookMacroEnabled
End Sub
If you want the user to get the option to select the location to save the file, you can use call the Saveas dialog box. The below code shows the Saveas dialog box and allows the user to select the location where the file should be saved.
Sub SaveWorkbook()
Dim FilePath As String
FilePath = Application.GetSaveAsFilename
ActiveWorkbook.SaveAs Filename:=FilePath & ".xlsm", FileFormat:=xlOpenXMLWorkbookMacroEnabled
End Sub
Note that instead of using FileFormat:=xlOpenXMLWorkbookMacroEnabled, you can also use FileFormat:=52, where 52 is the code xlOpenXMLWorkbookMacroEnabled.
Saving All Open Workbooks
If you have more than one workbook open and you want to save all the workbooks, you can use the code below:
Sub SaveAllWorkbooks()
Dim wb As Workbook
For Each wb In Workbooks
wb.Save
Next wb
End Sub
The above saves all the workbooks, including the ones that have never been saved. The workbooks that have not been saved previously would get saved in the default location.
If you only want to save those workbooks that have previously been saved, you can use the below code:
Sub SaveAllWorkbooks()
Dim wb As Workbook
For Each wb In Workbooks
If wb.Path <> "" Then
wb.Save
End If
Next wb
End Sub
Saving and Closing All Workbooks
If you want to close all the workbooks, except the workbook that has the current code in it, you can use the code below:
Sub CloseandSaveWorkbooks()
Dim wb As Workbook
For Each wb In Workbooks
If wb.Name <> ThisWorkbook.Name Then
wb.Close SaveChanges:=True
End If
Next wb
End Sub
The above code would close all the workbooks (except the workbook that has the code – ThisWorkbook). In case there are changes in these workbooks, the changes would be saved. In case there is a workbook that has never been saved, it will show the save as dialog box.
Save a Copy of the Workbook (with Timestamp)
When I am working with complex data and dashboard in Excel workbooks, I often create different versions of my workbooks. This is helpful in case something goes wrong with my current workbook. I would at least have a copy of it saved with a different name (and I would only lose the work I did after creating a copy).
Here is the VBA code that will create a copy of your workbook and save it in the specified location.
Sub CreateaCopyofWorkbook()
ThisWorkbook.SaveCopyAs Filename:="C:UserssumitDesktopBackupCopy.xlsm"
End Sub
The above code would save a copy of your workbook every time you run this macro.
While this works great, I would feel more comfortable if I had different copies saved whenever I run this code. The reason this is important is that if I make an inadvertent mistake and run this macro, it will save the work with the mistakes. And I wouldn’t have access to the work before I made the mistake.
To handle such situations, you can use the below code that saves a new copy of the work each time you save it. And it also adds a date and timestamp as a part of the workbook name. This can help you track any mistake you did as you never lose any of the previously created backups.
Private Sub Workbook_BeforeSave(ByVal SaveAsUI As Boolean, Cancel As Boolean)
ThisWorkbook.SaveCopyAs Filename:="C:UserssumitDesktopBackupCopy" & Format(Now(), "dd-mm-yy-hh-mm-ss-AMPM") & ".xlsm"
End Sub
The above code would create a copy every time you run this macro and add a date/time stamp to the workbook name.
Create a New Workbook for Each Worksheet
In some cases, you may have a workbook that has multiple worksheets, and you want to create a workbook for each worksheet.
This could be the case when you have monthly/quarterly reports in a single workbook and you want to split these into one workbook for each worksheet.
Or, if you have department wise reports and you want to split these into individual workbooks so that you can send these individual workbooks to the department heads.
Here is the code that will create a workbook for each worksheet, give it the same name as that of the worksheet, and save it in the specified folder.
Sub CreateWorkbookforWorksheets()
Dim ws As Worksheet
Dim wb As Workbook
For Each ws In ThisWorkbook.Worksheets
Set wb = Workbooks.Add
ws.Copy Before:=wb.Sheets(1)
Application.DisplayAlerts = False
wb.Sheets(2).Delete
Application.DisplayAlerts = True
wb.SaveAs "C:UserssumitDesktopTest" & ws.Name & ".xlsx"
wb.Close
Next ws
End Sub
In the above code, we have used two variable ‘ws’ and ‘wb’.
The code goes through each worksheet (using the For Each Next loop) and creates a workbook for it. It also uses the copy method of the worksheet object to create a copy of the worksheet in the new workbook.
Note that I have used the SET statement to assign the ‘wb’ variable to any new workbook that is created by the code.
You can use this technique to assign a workbook object to a variable. This is covered in the next section.
Assign Workbook Object to a Variable
In VBA, you can assign an object to a variable, and then use the variable to refer to that object.
For example, in the below code, I use VBA to add a new workbook and then assign that workbook to the variable wb. To do this, I need to use the SET statement.
Once I have assigned the workbook to the variable, all the properties of the workbook are made available to the variable as well.
Sub AssigntoVariable()
Dim wb As Workbook
Set wb = Workbooks.Add
wb.SaveAs Filename:="C:UserssumitDesktopExamples.xlsx"
End Sub
Note that the first step in the code is to declare ‘wb’ as a workbook type variable. This tells VBA that this variable can hold the workbook object.
The next statement uses SET to assign the variable to the new workbook that we are adding. Once this assignment is done, we can use the wb variable to save the workbook (or do anything else with it).
Looping through Open Workbooks
We have already seen a few examples codes above that used looping in the code.
In this section, I will explain different ways to loop through open workbooks using VBA.
Suppose you want to save and close all the open workbooks, except the one with the code in it, then you can use the below code:
Sub CloseandSaveWorkbooks()
Dim wb As Workbook
For Each wb In Workbooks
If wb.Name <> ThisWorkbook.Name Then
wb.Close SaveChanges:=True
End If
Next wb
End Sub
The above code uses the For Each loop to go through each workbook in the Workbooks collection. To do this, we first need to declare ‘wb’ as the workbook type variable.
In every loop cycle, each workbook name is analyzed and if it doesn’t match the name of the workbook that has the code, it’s closed after saving its content.
The same can also be achieved with a different loop as shown below:
Sub CloseWorkbooks()
Dim WbCount As Integer
WbCount = Workbooks.Count
For i = WbCount To 1 Step -1
If Workbooks(i).Name <> ThisWorkbook.Name Then
Workbooks(i).Close SaveChanges:=True
End If
Next i
End Sub
The above code uses the For Next loop to close all the workbooks except the one that has the code in it. In this case, we don’t need to declare a workbook variable, but instead, we need to count the total number of open workbooks. When we have the count, we use the For Next loop to go through each workbook. Also, we use the index number to refer to the workbooks in this case.
Note that in the above code, we are looping from WbCount to 1 with Step -1. This is needed as with each loop, the workbook gets closed and the number of workbooks gets decreased by 1.
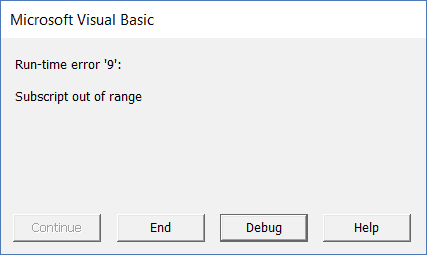
Error while Working with the Workbook Object (Run-time error ‘9’)
One of the most common error you may encounter when working with workbooks is – Run-time Error ‘9’ – Subscript out of range.
Generally, VBA errors are not very informative and often leave it to you to figure out what went wrong.
Here are some of the possible reasons that may lead to this error:
- The workbook that you’re trying to access does not exist. For example, if I am trying to access the fifth workbook using Workbooks(5), and there are only 4 workbooks open, then I will get this error.
- If you’re using a wrong name to refer to the workbook. For example, if your workbook name is Examples.xlsx and you use Example.xlsx. then it will show you this error.
- If you haven’t saved a workbook, and you use the extension, then you get this error. For example, if your workbook name is Book1, and you use the name Book1.xlsx without saving it, you will get this error.
- The workbook you’re trying to access is closed.
Get a List of All Open Workbooks
If you want to get a list of all the open workbooks in the current workbook (the workbook where you’re running the code), you can use the below code:
Sub GetWorkbookNames()
Dim wbcount As Integer
wbcount = Workbooks.Count
ThisWorkbook.Worksheets.Add
ActiveSheet.Range("A1").Activate
For i = 1 To wbcount
Range("A1").Offset(i - 1, 0).Value = Workbooks(i).Name
Next i
End Sub
The above code adds a new worksheet and then lists the name of all the open workbooks.
If you want to get their file path as well, you can use the below code:
Sub GetWorkbookNames()
Dim wbcount As Integer
wbcount = Workbooks.Count
ThisWorkbook.Worksheets.Add
ActiveSheet.Range("A1").Activate
For i = 1 To wbcount
Range("A1").Offset(i - 1, 0).Value = Workbooks(i).Path & "" & Workbooks(i).Name
Next i
End Sub
Open the Specified Workbook by Double-clicking on the Cell
If you have a list of file paths for Excel workbooks, you can use the below code to simply double-click on the cell with the file path and it will open that workbook.
Private Sub Workbook_SheetBeforeDoubleClick(ByVal Sh As Object, ByVal Target As Range, Cancel As Boolean)
Workbooks.Open Target.Value
End Sub
This code would be placed in the ThisWorkbook code window.
To do this:
- Double click on the ThisWorkbook object in the project explorer. Note that the ThisWorkbook object should be in the workbook where you want this functionality.
- Copy and paste the above code.
Now, if you have the exact path of the files that you want to open, you can do that by simply double-clicking on the file path and VBA would instantly open that workbook.
Where to Put the VBA Code
Wondering where the VBA code goes in your Excel workbook?
Excel has a VBA backend called the VBA editor. You need to copy and paste the code into the VB Editor module code window.
Here are the steps to do this:
- Go to the Developer tab.

- Click on the Visual Basic option. This will open the VB editor in the backend.
- In the Project Explorer pane in the VB Editor, right-click on any object for the workbook in which you want to insert the code. If you don’t see the Project Explorer go to the View tab and click on Project Explorer.
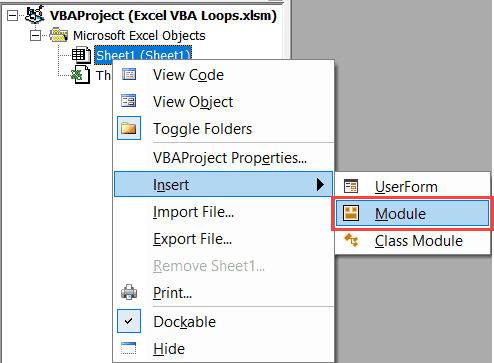
- Go to Insert and click on Module. This will insert a module object for your workbook.

- Copy and paste the code in the module window.


You May Also Like the Following Excel VBA Tutorials:
- How to Record a Macro in Excel.
- Creating a User Defined Function in Excel.
- How to Create and Use Add-in in Excel.
- How to Resue Macros by placing it in the Personal Macro Workbook.
- Get the List of File Names from a Folder in Excel (with and without VBA).
- How to Use Excel VBA InStr Function (with practical EXAMPLES).
- How to Sort Data in Excel using VBA (A Step-by-Step Guide).
 One of the most basic and common operations in Excel is opening a workbook. Regardless of their level (beginner or advanced), virtually every single Excel user has to constantly open workbooks. In fact:
You’ve probably opened a countless amount of Excel workbooks yourself.
If you’re working with VBA, it’s only a matter of time before you need to start creating macros to open Excel workbooks. This Excel tutorial focuses on this basic and common Excel operation:
How to open a workbook using VBA.
I cover this topic by explaining 2 of the most basic macros you can use to open an Excel workbook.
This Excel VBA Open Workbook Tutorial is accompanied by an Excel workbook containing the data and basic structure macros I use below. You can get immediate free access to this example workbook by clicking the button below.

Both of these macros rely on 1 or both of the following methods:
- The Workbooks.Open method.
- The Application.GetOpenFilename method.
Therefore, the second part of this tutorial analyzes both of these methods and goes through each of their parameters. The purpose of this section is to help you get some basic awareness of some of the things you can do when using these methods in your macros.
In addition to help you open workbooks using VBA, the Application.GetOpenFilename method allows you to specify the paths and names of particular Excel workbooks. You’ll likely encounter situations where knowing this (how to allow the user to specify a path and filename) can come in handy.
So let’s take a look at the exact topics that I explain in this blog post:
And let’s start by taking a look at what is, perhaps, the simplest case of opening an Excel workbook using VBA:
How To Open A Workbook Using VBA: The Basic Case
Within Visual Basic for Applications, the method that opens an Excel workbook is the Workbooks.Open method.
The Workbooks.Open method has 15 optional arguments. Each of these 15 optional arguments allows you determine a different aspect of how the Open method opens an Excel workbook.
Since taking a look at 15 arguments at once can get a little overwhelming, let’s start by taking a look at the most basic case: opening an Excel workbook whose name you know. You specify which workbook you want to open by using the Filename argument.
More specifically, the basic VBA statement syntax to open a particular workbook is:
Workbooks.Open Filename:="File_Name"
Or
Workbooks.Open "File_Name"
Where “File_Name” is the file name of the workbook that you want to open with VBA. As shown in the example below, when specifying the workbook’s file name, you must provide the full path and name of the file. I explain how to make this easier below.
The first sample statement above uses named arguments (Filename:=”File_Name”). For the reasons that I explain here, this is my preferred syntax. However, you can also use the second syntax (simply “File_Name”.
Let’s take a look at the Workbooks.Open method in practice:
The following macro (named Open_Workbook_Basic), opens the Excel workbook whose name is “Example – VBA open workbook”. This workbook is saved in the D drive.

As mentioned above, notice that when specifying the filename, you must provide the whole file path, name and extension.

The sample file path above is relatively simple. In particular, there’s no need to go through several sub-folders in order to get to the sample workbook. However…
Probably not many people are able to remember the exact file paths, names and extensions for the files in their laptop. And even then, few would want to type the whole thing every time a new Excel workbook is to be opened. In other words: Having the user type the filename (without browsing) is both:
- Tedious; and
- Prone to errors/mistakes.
Since you want to ensure that your macro receives the correct file name (including the whole path and its extension), you’ll usually use slightly more complicated macros than the sample Open_Workbook_Basic Sub procedure displayed above.
Let’s take a look at the simplest way to do this: replicating the way Excel usually works when you browse the computer drive in order to find the particular file you want to open.
How To Open A Workbook Using VBA: Get The File Path With The GetOpenFilename Method
You’re probably quite familiar with the following dialog box:

This is the Open dialog box. Excel displays this dialog whenever you browse for purposes of finding and selecting a file to open.
Usually, whenever Excel displays the Open dialog box, you simply need to:
- Navigate to the folder containing the Excel workbook you want to open.
- Select the file to be opened and click on the Open button in the lower-right corner of the Open dialog.
The following screenshot shows how the Open dialog looks like if you were to open the workbook named “Example – VBA open workbook” that the Open_Workbook_Basic macro above opens.

You’ll probably agree with me that using this method of choosing the particular Excel workbook that you want to open is much easier than remembering the full file path.
Fortunately, you can replicate this way of operating with VBA. More precisely, you do this by using the Application.GetOpenFilename method.
Excel’s Application.GetOpenFilename method does 2 things:
- Displays a customizable Open dialog box; and
- Returns the full path/name/extension of the file chosen by the user.
The Application.GetOpenFilename method doesn’t open the file chosen by the user. You still need to rely on the Workbooks.Open method explained above for purposes of actually opening the chosen file. GetOpenFilename simply gives you a mechanism/tool to ask the user for the name(s) of the file(s) that the procedure works with.
The fact that GetOpenFilename doesn’t actually open the file makes this a very versatile method. The reason is that this allows you to use this precise same method in cases in which you need to get the path/name/extension of an Excel workbook for purposes other than opening it.
Therefore, in order to open an Excel workbook through the Open dialog box while using VBA, you need to use both of the following methods:
- Item #1: The Application.GetOpenFilename method returns the name of the workbook to be opened.
- Item #2: The Workbooks.Open method actually opens the workbook whose path/name/extension is provided by the Application.GetOpenFilename method.
The Application.GetOpenFilename method has 5 variables. However, just as we did with the Workbooks.Open method, let’s take a look at a very basic piece of VBA code that allows you to:
- Browse the available drives for purposes of finding and selecting the Excel workbook you want to open; and
- Actually open the selected file.
In such a case, the syntax of the basic VBA statements that you need is as follows:
Dim my_FileName As Variant
my_FileName = Application.GetOpenFilename(FileFilter:="Excel Files,*.xl*;*.xm*")
If my_FileName <> False Then
    Workbooks.Open FileName:=my_FileName
End If
The following screenshot shows the full VBA code of a sample macro called “Open_Workbook_Dialog”.

This Excel VBA Open Workbook Tutorial is accompanied by an Excel workbook containing the data and basic structure macros I use (including the Open_Workbook_Dialog macro). You can get immediate free access to this example workbook by clicking the button below.
Let’s take a look at each of the statements that makes part of the Open_Workbook_Dialog macro to understand how it proceeds:
Statement #1: Dim my_FileName As Variant
This particular statement is a variable declaration statement. The purpose of declaring a variable in this macro is to store the file name chosen by the user.
This variable declaration statement can be divided in the following 3 items:

Item #1: Dim Statement
As I explain in this macro tutorial, the Dim statement is the most common way to declare a VBA variable.
Item #2: Variable Name
In this particular case, the name of the variable being declared is “my_FileName”.
Item #3: Data Type
my_FileName is declared as being of the Variant data type. This variable is declared as a Variant because the Application.GetOpenFilename method can return different types of data.
Statement #2: my_FileName = Application.GetOpenFilename(FileFilter:=”Excel Files,*.xl*;*.xm*”)
This VBA statement is characterized by the following 2 aspects:
- Makes an assignment to the VBA variable my_FileName; and
- Uses the GetOpenFilename method that I introduce above.
For purposes of carrying out a closer examination of this statement, I divide it in the following 3 items:

Let’s take a look at each of them separately:
Item #1: my_FileName =
The first part of the statement follows the general rule in which a value or expression is assigned to a VBA variable, by using the equal sign (=).
In these cases, the equal sign (=) is an assignment operator. Therefore, it doesn’t represent an equality.
In the case of the Open_Workbook_Dialog macro, the equal sign (=) is assigning:
- The result of the expression that appears to its right (which I explain in the next section below); to
- The VBA variable that is on the left side (my_FileName).
Let’s take a look at the items on the right side of the equal sign:
Item #2: Application.GetOpenFilename
This item is the reference to the Application.GetOpenFilename method. As explained above, this particular method:
- Displays a customizable Open dialog box; and
- Returns the file name chosen by the user (without actually opening it).
- If the user selects multiple files (you can determine this by using the MultiSelect argument I explain below, GetOpenFilename returns an array of the file names chosen by the user. This is the case even if the user only selects 1 file.
- If the user cancels the Open dialog box (for example, presses the Cancel button), GetOpenFilename returns False.
This leads us to the last item of the statement:
Item #3: (FileFilter:=”Excel Files,*.xl*;*.xm*”)
FileFilter is one of the different parameters of the GetOpenFilename method. As implied by its name, this argument allows you to specify criteria for file-filtering.
It’s an optional argument. However, I include it for purposes of specifying file filtering criteria.
If you omit the FileFilter argument when using the GetOpenFilename method, it defaults to all files (*.*).
In the sample VBA code that appears above (and throughout the rest of this Excel tutorial), I use named arguments. However, that’s not mandatory. If you don’t want to use named arguments, you can use the following statement syntax:
my_FileName = Application.GetOpenFilename("Excel Files,*.xl*;*.xm*")
Let’s take a look at the characteristics of the FileFilter argument:
Characteristic #1: What Does The FileFilter Argument Do.
As explained above, FileFilter determines what are the criteria used for filtering files when the Open dialog box is displayed.
In more practical terms, the FileFilter argument determines what appears in the Files of type drop-down list box on the lower-right corner of the Open dialog box. As shown in the image below, in the case of the Open_Workbook_Dialog macro there’s only one item in the Files of type drop-down list box (Excel Files):

Characteristic #2: Syntax Of The FileFilter Argument.
The appropriate syntax of the FileFilter Argument is determined by the following rules:
- Rule #1: Each individual filter is specified by pairing 2 strings as follows:
- Part #1: A descriptive string. You can omit this part, although I wouldn’t recommend it. In the case of the sample Open_Workbook_Dialog macro, this is “Excel Files”. Notice (in the image above) how this is the text that actually appears in the Files of the type drop-down list of the Open dialog box.
- Part #2: A comma (,) separating part #1 above and part #2 below.
- Part #3: The MS-DOS wildcard file-type filter specification. In other words, this part determines how the files are filtered, depending on their type. In the Open_Workbook_Dialog macro, this part is *.xl*;*.xm*.
- Rule #2: The structure of the file types that you use in the filter specification (part #3 above) is generally (i) an asterisk (*), (ii) a dot (.), and (iii) an indication of the file extension using an asterisk (as wildcard, if necessary) and (if necessary) letters. At the most basic level, the way to specify all files is asterisk dot asterisk (*.*). For example, the Open_Workbook_Dialog macro uses the following 2 file type specifications: *.xl* and *.xm*. Notice how, in both cases: (i) there is an asterisk (*) followed by (ii) a dot (.) and (iii) the first 2 letters of the file extension (xl and xm) followed by an asterisk (*) used as wildcard. Due to the wildcard asterisk, these 2 specifications cover any file extension beginning with .xl (such as .xlsx, .xlsm, .xlsb, .xltx, .xltm, .xls, .xlt, .xlam, .xla and .xlw) or .xm (.xml).
- Rule #3: As shown by the fact that the Open_Workbook_Dialog macro uses 2 file type specifications, you can include 1 or several file types in a particular filter. When including more than 1 file type in a particular filter, you must separate them with a semi-colon (;). Notice how this is the case in the macro under analysis. More precisely, .xl* and *.xm* are separated by a semi-colon (;) (*.xl*;*.xm*).
- Rule #4: In addition to the possibility of using multiple file-types, you can create more than 1 actual filter. In such a case, you separate the filters using commas (,). The sample Open_Workbook_Dialog macro above only has one filter. This is determined by the string pairing “Excel Files,*.xl*;*.xm*”. You can, however, separate this single filter into 2 filters (displaying “xl Files” for *.xl* and “xm Files” for *.xm*) as follows:
 The way to get these 2 filters is to replace the single string pairing “Excel Files,*.xl*;*.xm*” with the following: “xl Files,*.xl*,xm Files,*.xm*”.
 The way to get these 2 filters is to replace the single string pairing “Excel Files,*.xl*;*.xm*” with the following: “xl Files,*.xl*,xm Files,*.xm*”.
Summary Of Statement #2
The final effect of the whole statement explained above is as follows:
- #1: The Open dialog box is displayed to allow the user to select a file.
- #2: If the user selects a file, its file name is assigned to the variable called my_FileName.
This leads us to the last statement of the Open_Workbook_Dialog macro, which uses the value of the my_FileName variable.
Statement #3: If my_FileName <> False Then Workbooks.Open FileName:=my_FileName
End If
This is an If… Then… Else statement. These type of statements proceed as follows:
- Step #1: Carry out a test to determine whether a particular condition is met.
- Step #2: If the condition is met, a certain group of statements are executed. If the condition isn’t met, the statements aren’t executed.
In the case of the Open_Workbook_Dialog macro, the If… Then… Else statement proceeds as follows:
Step #1: Determine Whether The User Has Select a Workbook
Statement #2 (explained above) assigns the file selected by the user to the variable my_FileName. If the user fails to select a file (by, for example, cancelling the operation), my_FileName returns False.
The test carried out by the If… Then… Else statement under analysis checks whether the my_FileName variable has been assigned a particular file path/name/extension by testing the condition “my_FileName <> False”.
In other words, the condition “my_FileName <> False” is met only when the user has chosen a particular workbook in the Open dialog box displayed by the Application.GetOpenFilename method.
If the condition is met, the If…Then… Else statement proceeds to:
Step #2: Open Excel Workbook
The second part of the If… Then… Else statement we’re looking at is “Workbooks.Open FileName:=my_FileName”.
You already know what this statement does. It’s the Workbooks.Open method described above.
The purpose of the Workbooks.Open method is to open an Excel workbook. In this case, the workbook that is opened is that whose file name has been assigned to the variable my_FileName.
In other words, if the user selects a file when the Open dialog box is displayed, the If… Then… Else statement opens that file.
The Workbooks.Open Method: A Closer Look
As explained at the beginning of this Excel tutorial, Workbooks.Open is the method that you’ll generally use to open Excel workbooks using VBA.
We have already seen the basics of the Workbooks.Open method and its most basic use above. However, in that particular case, I mentioned that this method has 15 different parameters. So far, we’ve only checked one: FileName.
I assume that, if you’re reading this, you want to learn about some more advanced cases of opening Excel workbooks using VBA. In order to do this, let’s take a closer look at the Workbooks.Open method and its different parameters.
The Workbooks.Open Method: Full Syntax
The full syntax of the Workbooks.Open method in Visual Basic for Applications is as follows:
expression.Open(FileName, UpdateLinks, ReadOnly, Format, Password, WriteResPassword, IgnoreReadOnlyRecommended, Origin, Delimiter,Editable, Notify, Converter, AddToMru, Local, CorruptLoad)
In this case, “expression” stands for a variable representing a Workbook object. In most cases, however, you can simply rely on the syntax used in the sample Open_Workbook_Basic and Open_Workbook_Dialog macros.
In other words, you’ll generally replace “expression” with the Workbooks object itself:
Workbooks.Open
All of the parameters of the Workbooks.Open method, which appear within parentheses above, are optional. Let’s take a look at them!
Parameters Of The Workbooks.Open Method
The following table introduces the 15 optional parameters of the Workbooks.Open method.
| Position | Name | Description |
| 1 | FileName | Name of workbook to be opened. |
| 2 | UpdateLinks | Way in which external references/links in the file are updated. |
| 3 | ReadOnly | Determines whether workbook opens in read-only mode. |
| 4 | Format | Applies when opening a text file.
Determines the delimiter character. |
| 5 | Password | Password required to open protected workbook. |
| 6 | WriteResPassword | Password required to write in a write-reserved workbook. |
| 7 | IgnoreReadOnlyRecommended | Applies when a workbook is saved with Read-Only Recommended option enabled.
Determines whether the read-only recommended message is displayed. |
| 8 | Origin | Applies when opening a text file.
Indicates where the file originated. |
| 9 | Delimiter | Applied when opening a text file and the Format parameter above (No. 4) is a custom character.
Specifies what is the custom character to be used as delimiter. |
| 10 | Editable | Applies to: (i) old Excel add-ins (created in Excel 4.0) and (ii) templates.
When applied to an Excel 4.0 add-in, determines whether add-in is opened as hidden or visible. If applied to a template, determines whether template is opened for editing, or if a new workbook (based on the template) is created. |
| 11 | Notify | Applies when a file can’t be opened in read/write mode.
Determines whether file is added to file notification list (or no notification is requested). |
| 12 | Converter | Determines what file converter to try upon opening the file. |
| 13 | AddToMru | Determines whether file is added to list of recent files. |
| 14 | Local | Determines whether file is saved against language of Excel (usually local) or VBA (usually US-English). |
| 15 | CorruptLoad | Determines the processing of the file when opened |
I provide a more detailed description of the parameters in the sections below. The only exception is the FileName argument, which I explain above.
However, let’s take a closer look at the other parameters:
Argument #2: UpdateLinks
The UpdateLinks argument is the one you can use if you’re interested in determining whether the external references or links within the opened Excel workbook are or aren’t updated.
In other words, UpdateLinks determines how those external references or links are updated. The UpdateLinks parameter can take the following 2 values:
- 0: In this case, external references/links aren’t updated when the Excel workbook is opened.
- 3: When using this value, the external references/links are updated when the workbook opens.
The following screenshot shows the VBA code of the sample Open_Workbook_Basic macro where the UpdateLinks parameter has been added and is set to 3.

Since the UpdateLinks parameter isn’t required, you can omit it. In that case, Excel generally defaults to asking the user how links are updated.
Argument #3: ReadOnly
If you set the ReadOnly argument to True, the Excel workbook is opened in read-only mode.
When this argument is added to the sample Open_Workbook_Basic macro, the VBA code looks as follows:

In this case, the Excel workbook is opened as read-only, meaning that any changes made aren’t saved.
When I execute the Open_Workbook_Basic macro, Excel warns me about the opened workbook being read-only. Check out, for example, the screenshot below:

Arguments #4 and#9: Format and Delimiter
The Format argument of the Workbooks.Open method is only relevant when opening text files.
Format determines what the delimiter character is. The delimiter is what allows you to split a single piece of content into different cells. By choosing the value of the Format argument, you specify what delimiter is used.
The following are the possible Format values and the delimiter each of them represents:
- 1: Tabs.
- 2: Commas.
- 3: Spaces.
- 4: Semicolons.
- 5: Nothing.
- 6: A custom character, which you then specify by using the Delimiter argument. The Delimiter argument must be a string. Also, the Delimiter is a single character. If you enter a longer string, the first character of the string is used as delimiter.
If you omit the Format argument when opening a text file, Excel uses whatever delimiter is currently being used.
Since the Open_Workbook_Basic macro makes reference to the Excel workbook named “Example – VBA open workbook.xlxs”, the Format argument isn’t really useful. However, for illustration purposes, the following screenshot shows the VBA code behind this macro using this argument for purposes of setting spaces as the delimiter.

The following image shows how the VBA code looks like if the Format argument is set to 6 (custom delimiter) and the Delimiter argument is defined as ampersand (&).

Arguments #5 and #6: Password and WriteResPassword
You’d generally use the Password and WriteResPassword arguments when you’re working with Excel workbooks that are protected or write-reserved.
Both the Password and WriteResPassword are strings representing a particular password. Their main difference is on what type of protection the Excel workbook being opened has. More precisely:
- Password: Is the password required to open a protected Excel workbook.
- WriteResPassword: Is the password required to write in a write-reserved workbook.
If you’re opening an Excel workbook that anyway requires a password and you omit the relevant argument (Password or WriteResPassword, as the case may be), Excel asks the user for the appropriate password.
Let’s assume, for illustrative purposes, that the “Example – VBA open workbook.xlsx” opened by the Open_Workbook_Basic macro is protected by the password “VBA open workbook”. The following screenshot displays the VBA code of the macro with the appropriate Password argument:

Argument #7: IgnoreReadOnlyRecommended
Set a particular Excel workbook to be read-only recommended by activating the Read-Only Recommended option when saving the relevant workbook.
The consequence of this is that, when the read-only recommended workbook is opened, Excel displays a message recommending that the workbook is opened as read-only.

If the IgnoreReadOnlyRecommended argument is set to True, Excel doesn’t display this particular message when opening the workbook.
The following screenshot displays the VBA code of the Open_Workbook_Basic macro with the IgnoreReadOnlyRecommended argument.

Note that, in this particular case, I’ve deleted the previously added ReadOnly argument. The reason for this is that, if both the ReadOnly and IgnoreReadOnlyRecommended arguments are set to True, Excel simply opens the workbook in read-only mode as required by the ReadOnly argument.
Argument #8: Origin
The Origin argument is only applicable when opening text files. You can use Origin to specify the platform (Microsoft Windows, Mac or MS-DOS) in which the file originated. Indicating the origin of the file allows Excel to map (i) code pages and (ii) Carriage Return/Line Feed properly.
The Origin argument generally takes one of the XlPlatform values, as follows:
- 1: xlMacintosh.
- 2: xlMSDOS.
- 3: xlWindows.
If you omit the Origin argument, Excel uses the operating system of the computer that is opening the file.
The file named “Example – VBA open workbook.xlsx” that is opened by the Open_Workbook_Basic macro isn’t a text file. Therefore, I include the Origin argument in the screenshot below (specifying the origin as Microsoft Windows) only for illustrative purposes:

Argument #9 (Delimiter) is explained above.
Argument #10: Editable
The Editable argument applies to the following types of files:
- Microsoft Excel 4.0 add-ins. You’ll probably not work too much with these because it’s quite an old format. To give you an idea: Excel 4.0 was released in 1992. Editable doesn’t apply to any add-ins that have been created in later versions of Excel.
- Excel templates.
The Editable parameter of the Workbooks.Open method works differently depending on which of the above files you’re working with. The general rules are as follows:
When working with Microsoft Excel 4.0 add-ins:
- Setting Editable to True, opens the relevant add-in in a visible window.
- Setting Editable to False (which is the default value), opens the add-in as hidden. Additionally, the add-in can’t be unhidden.
When working with a template:
- Setting Editable to True opens the template for editing.
- Setting Editable to False (the default value), opens a new Excel workbook that is based on the relevant template.
The workbook opened by the sample Open_Workbook_Basic property is neither a Microsoft Excel 4.0 add-on nor a template. Therefore, the Editable parameter isn’t applicable.
However, for illustrative purposes, the following is an example of how the VBA code to open “Example – VBA open workbook.xlsx” workbooks looks like with the Editable parameter set to True:

Argument #11: Notify
The Notify argument of the Workbooks.Open method applies when you’re opening a file that can’t be opened in read/write mode. If you set the Notify argument to True, Visual Basic for Applications proceeds as follows whenever it encounters such a file:
- Step #1: The file is opened as read-only and added to the file notification list. The file notification list stores files that could only be opened in read-only mode.
- Step #2: The status of the file notification list is checked to confirm when the file is available. In more precise terms, the file notification list is polled.
- Step #3: When the file becomes available, the user is notified about this.
If you omit the Notify argument, or set it to False:
- The file isn’t added to the file notification list. In other words, no notification that the file is available is requested or received.
- The attempt to open a file that isn’t available simply fails.
The following screenshot shows the VBA code of the sample Open_Workbook_Basic macro with the Notify argument set to True:

Argument #12: Converter
The Converter argument is applicable whenever you want/need to use file converters. More precisely, you use the Converter parameter to specify the file converter that should be used first when Visual Basic for Applications tries to open a file.
In order to know how to specify a particular file converter, you need to understand the Application.FileConverters property. This property returns information about any file converters that are currently installed.
For example, if you use the Application.FileConverters property without specifying its arguments, the property returns an array with information about all the file converters that are installed. The array is organized as follows:
- The number of rows is equal to the number of installed file converters. Each converter has its own row.
- The number of columns is 3. The first column displays the long name of the relevant file converter. The second column contains the path of the converter’s DLL or code resource. The third column shows the file-extension search string.
When working with the Converter argument, you’ll be interested in the row numbers. The reason for this is the way in which you specify the first file converter to use when opening a file:
- The Converter argument is an index.
- Each file converter has such an index.
- The index is the row numbers of the file converters that the Application.FileConverters property (explained above) returns.
There may be situations in which the file converter that you specify with the Converter argument (which is tried first) doesn’t recognize the file being opened. In such cases, the other converters are tried.
Argument #13: AddToMru
AddToMru determines whether the Excel workbook that is being opened is added to the list of recently used files or not. MRU stands for Most Recently Used.
The most recently used list is the list of files that have been recently opened in Excel. You can generally find it in the Open tab of the Backstage View.

The default value of AddToMru is False. In this case, the workbook isn’t added to the list of recently used files.
In order to have the Excel workbook added to the list of recently used files, set AddToMru to True. The image below shows how this looks like in the case of the Open_Workbook_Basic macro:

Argument #14: Local
The Local parameter makes reference to language and localization settings. Therefore, you may encounter/use this argument if the macro you’re creating is to be used in an international setting where some computers may have different language settings.
More precisely, Local determines against which language are files saved. There are 2 possible values: True or False. Depending on the value you choose, files are saved as follows:
- True: Files are saved against Excel’s language. This language is generally determined from the control panel settings.
- False: Files are saved against VBA’s language. This language is generally English. There is a relatively obscure exception to this rule: When the VBA project containing the Workbooks.Open method is an old internationalized XL5/95 project. My guess is that the likelihood of you encountering such a file nowadays is about as high as that of finding the Microsoft Excel 4.0 add-ins which I refer to above.
The following image shows how the Local argument looks like when added to the sample Open_Workbook_Basic macro:

Argument #15: CorruptLoad
This is the final argument of the Workbooks.Open method. CorruptLoad determines how a file that has been corrupted is processed upon opening.
The CorruptLoad argument can take 1 of the following 3 values:
- 0: Represents xlNormalLoad. In this case, the Excel workbook is opened normally. This is the default value, and applies if you don’t specify anything else.
- 1: Stands for xlRepairFile. In such a case, the Excel workbook is opened in repair mode. In repair mode, Excel tries to recover as much as possible of the workbook being opened.
- 2: Is the value for xlExtractData. When using this processing mode, the workbook is opened in extract data mode. In extract data mode, Excel extracts the values and formulas from the workbook. Generally, you use extract data mode when the repair mode fails to recover the data/workbook appropriately.
In the following screenshot, the VBA code of the Open_Workbook_Basic macro includes the CorruptLoad parameter. In this case, CorruptLoad is set to 1 (xlRepairFile).

When executing this macro, Excel opens the “Example – VBA open workbook” file in repair mode and displays the following message:

The first time I read the arguments of the Workbooks.Open method, I was slightly surprised that there was no argument to determine whether macros are enabled or disabled upon opening an Excel workbook using VBA.
Eventually, I found out…
How To Enable Or Disable Macros In An Excel Workbook Opened With VBA
Macros are enabled by default whenever you open a file programmatically.
In order to modify the macro security setting that applies when opening an Excel workbook programmatically, you use the Application.AutomationSecurity property. This property allows you to set the security mode that Excel uses when opening files programmatically.
You can generally set the Application.AutomationSecurity property to any of the following 3 constants:
- 1: Represents msoAutomationSecurityLow which enables all macros. As mentioned at the beginning of this section, msoAutomationSecurityLow is the default value.
- 2: Stands for msoAutomationSecurityByUI. In this case, the actual security setting is set through the Security dialog box.
- 3: This is called msoAutomationSecurityForceDisable. This security mode disables all macros and doesn’t show any alerts. This restriction doesn’t apply to Microsoft Excel 4.0 macros. If you open (programmatically) an Excel workbook containing such type of macros, Excel anyway asks the user if the file should be opened or not. This is the case even if the property is set to msoAutomationSecurityForceDisable.
You may want to (generally) reset Application.AutomationSecurity to the default (msoAutomationSecurityLow) after opening the appropriate Excel workbook and before ending the relevant Sub. This reduces the risk of having problems later when a particular solution relies on that default value.
The Application.GetOpenFilename Method: A Closer Look
I introduce and explain the basics of the Application.GetOpenFilename method at the beginning of this Excel tutorial.
The main reason to use the Application.GetOpenFilename method is that it allows your users to select the Excel workbook they want to open without having to remember or type the full path/name/extension. This has 2 main advantages:
- Advantage #1: Generally, using the Application.GetOpenFilename is more user-friendly than simply relying on the Workbooks.Open method.
- Advantage #2: The Application.GetOpenFilename ensures that the FileName parameter of the Workbooks.Open method is correct. In other words, GetOpenFilename pretty much guarantees that the path/name/extension argument used by the Open method is valid.
The Application.GetOpenFilename method has 5 arguments. In the sample Open_Workbooks_Dialog macro I’ve only used 1 (FileFilter).
In order to see which other settings you can work with, let’s take a closer look at the syntax of GetOpenFilename and its 4 other parameters:
The Application.GetOpenFilename Method: Full Syntax
The following is the full syntax of the Application.GetOpenFilename method:
expression.GetOpenFilename(FileFilter, FilterIndex, Title, ButtonText, MultiSelect)
“expression” stands for a variable representing an Application object. In practice, you’re like to end up simply using the Application object itself instead of such a variable. Therefore, you’re likely to commonly use the following syntax:
Application.GetOpenFilename
This is, for example, the syntax used in the Open_Workbook_Dialog macro, as shown below:

I explain the FileFilter argument of the Application.GetOpenFilename method above. Let’s continue to dissect this helpful method by taking a look at the other 4 available parameters:
Parameters Of the Application.GetOpenFilename Method
The following table lists and introduces the 5 parameters of the GetOpenFilename method. All of these arguments are optional.
The arguments of the Application.GetOpenFilename method (generally) focus on the possibility of making some minor modifications to the Open dialog.
| Position | Name | Description |
| 1 | FileFilter | Determines file filters. |
| 2 | FilterIndex | Determines the default file filter. |
| 3 | Title | Determines the title of the (usually called) Open dialog box. |
| 4 | ButtonText | Applies only when working in the Mac platform.
Determines the text of the button. |
| 5 | MultiSelect | Determines whether the user can select multiple files (or not). |
I explain all of these arguments (except FileFilter) in more detail below.
Argument #2: FilterIndex
You determine the file filtering criteria using the FileFilter argument. Since this argument allows you to create several filters, Excel needs a way to determine which the default one is.
Here is where the FilterIndex argument comes in:
It “specifies the index numbers of the default file filtering criteria“.
To understand how the FilterIndex parameter works in practice, take a look at the following Open dialog. Notice that there are 2 filters (xl Files and xm Files) in the Files of type drop-down list box.

This Open dialog box is displayed when the following version of the Open_Workbook_Dialog macro is executed. Notice how the FileFilter parameter sets 2 file-filtering criteria but there’s no FilterIndex argument.

When you omit the FilterIndex argument, Excel displays the first filter. In the case above, this filter is xl Files.
Let’s assume, however, that you want a different filter to be displayed as default. The following image shows how you can modify the Open_Workbook_Dialog macro to add the FilterIndex argument and select the second filter (xm Files) as the default filter.

The resulting Open dialog box looks as follows. Notice that, now, the default filter is indeed xm Files, even though it continues to be in the second position within the Files of type drop-down list box.

In the image above, you may also notice that the sample Excel workbook named “Example – VBA open workbook.xlsx” doesn’t appear as it does in previous screenshots. This is because it has been filtered out by the xm Files filter.
The xm Files filter is used to display only files whose extension begins with the letters “xm”. These are generally files that use the .xml format. In fact, the xm File filter can probably be specified more specifically with the string pair “xm Files,*.xml”.
The FilterIndex argument can only take values between 1 and the number of file filters that you’ve specified with the FileFilter argument. In the case above, this upper limit is 2.
If you set a value that is larger than the number of filters that actually exist, Excel uses the first file filter. In the case of the Open_Workbook_Dialog macro above, this would happen whenever the FilterIndex parameter has a value equal to or larger than 3. The VBA code for this case appears in the following image:

In this case, the Open dialog box is as follows. Notice how, as expected, the default filter is xl Files (the first filter).

Argument #3: Title
The Title argument of the Application.GetOpenFilename method is kind self-explanatory:
It allows you to determine the title of the dialog box that is usually known as the Open dialog. As you probably expect, if you omit this parameter, the title of the dialog box is “Open”.
The following image shows how the VBA code behind the Open_Workbook_Dialog macro looks like if the Title argument is set to “Example VBA Open Workbook”:

Notice how the new title appears at the top of the (previously Open) dialog box:

Argument #4: ButtonText
The ButtonText only applies in Mac platforms. When used in Windows, the argument is ignored.
It allows you to determine the text that appears in the action button. This is the button regularly known as the Open button.

The fact that you can’t change the text of the Open button when working in Windows may lead to slightly confusing situations:
Imagine, for example, that you’re using the GetOpenFilename method for a purpose other than opening an Excel workbook. In such cases, the button will continue to say “Open”, even though the file isn’t really opened later.
Argument #5: MultiSelect
The MultiSelect argument of the Application.GetOpenFilename method allows you to determine whether the user can select multiple file names at the same time.
By default, users are only allowed to select a single file. In this case, the value of the MultiSelect parameter is False. If you want to explicitly specify that MultiSelect is False, the VBA code of the Open_Workbook_Dialog macro looks as follows:

If you set MultiSelect to True, users can select several file names. If you set MultiSelect to True, the Application.GetOpenFilename method returns an array with the selected filenames. This is the case even if you select a single file. Therefore, when you enable MultiSelect, you must make the following 2 modifications to the VBA code example that appears above:
- Set the MultiSelect parameter to True.
- Treat the my_FileName variable as an array. This involves, in particular, modifying the way in which you open the workbook(s) whose filenames are returned by the GetOpenFilename method. If you only set MultiSelect to True (#1 above) but fail to appropriately handle the array that GetOpenFilename returns, VBA is likely to return a Type mismatch error.
Conclusion
2 of the most common operations when working with Excel are:
- Opening Excel workbooks; and
- Specifying file paths and names.
Workbooks.Open and Application.GetOpenFilename are the basic methods that you use for purposes of carrying out these operations with VBA. Therefore, you’re likely to use both of these methods quite bit when creating macros and working with Visual Basic for Applications.
Fortunately, if you’ve read this Excel tutorial, you’re knowledgeable enough to use both the Open and GetOpenFilename methods. In addition to knowing what their purpose is, you’ve seen what each of their parameters is and what they allow you to specify.
На чтение 19 мин. Просмотров 14.3k.

John Naisbitt
Мы тонем в информации, но жаждем знаний
Эта статья содержит полное руководство по использованию рабочей книги VBA.
Если вы хотите использовать VBA для открытия рабочей книги, тогда откройте «Открыть рабочую книгу»
Если вы хотите использовать VBA для создания новой рабочей книги, перейдите к разделу «Создание новой рабочей книги».
Для всех
других задач VBA Workbook, ознакомьтесь с кратким руководством ниже.
Содержание
- Краткое руководство по книге VBA
- Начало работы с книгой VBA
- Доступ к рабочей книге VBA по индексу
- Поиск всех открытых рабочих книг
- Открыть рабочую книгу
- Проверить открыта ли книга
- Закрыть книгу
- Сохранить книгу
- Копировать книгу
- Использование диалогового окна «Файл» для открытия рабочей книги
- Использование ThisWorkbook
- Использование ActiveWorkbook
- Примеры доступа к книге
- Объявление переменной VBA Workbook
- Создать новую книгу
- With и Workbook
- Резюме
- Заключение
Краткое руководство по книге VBA
В следующей таблице приведено краткое руководство по
основным задачам книги VBA.
| Задача | Исполнение |
| Доступ к открытой книге с использованием имени |
Workbooks(«Пример.xlsx») |
| Доступ к открытой рабочей книге (открывшейся первой) |
Workbooks(1) |
| Доступ к открытой рабочей книге (открывшейся последней) |
Workbooks(Workbooks.Count) |
| Доступ к активной книге | ActiveWorkbook |
| Доступ к книге, содержащей код VBA |
ThisWorkbook |
| Объявите переменную книги | Dim wk As Workbook |
| Назначьте переменную книги | Set wk = Workbooks(«Пример.xlsx») Set wk = ThisWorkbook Set wk = Workbooks(1) |
| Активировать книгу | wk.Activate |
| Закрыть книгу без сохранения | wk.Close SaveChanges:=False |
| Закройте книгу и сохраните | wk.Close SaveChanges:=True |
| Создать новую рабочую книгу | Set wk = Workbooks.Add |
| Открыть рабочую книгу | Set wk =Workbooks.Open («C:ДокументыПример.xlsx») |
| Открыть книгу только для чтения |
Set wk = Workbooks.Open («C:ДокументыПример.xlsx», ReadOnly:=True) |
| Проверьте существование книги | If Dir(«C:ДокументыКнига1.xlsx») = «» Then MsgBox «File does not exist.» EndIf |
| Проверьте открыта ли книга | Смотрите раздел «Проверить открыта ли книга» |
| Перечислите все открытые рабочие книги |
For Each wk In Application.Workbooks Debug.Print wk.FullName Next wk |
| Открыть книгу с помощью диалогового окна «Файл» |
Смотрите раздел «Использование диалогового окна «Файл» |
| Сохранить книгу | wk.Save |
| Сохранить копию книги | wk.SaveCopyAs «C:Копия.xlsm» |
| Скопируйте книгу, если она закрыта |
FileCopy «C:file1.xlsx»,»C:Копия.xlsx» |
| Сохранить как Рабочая книга | wk.SaveAs «Резервная копия.xlsx» |
Начало работы с книгой VBA
Мы можем получить доступ к любой открытой книге, используя код Workbooks («Пример.xlsm»). Просто замените Пример.xlsm именем книги, которую вы хотите использовать.
В следующем примере показано, как записать в ячейку на листе. Вы заметите, что мы должны были указать рабочую книгу, рабочий лист и диапазон ячеек.
Sub ZapisVYacheikuA1()

'Записывает 100 в ячейку A1 листа "Лист1" в МойVBA.xlsm
Workbooks("МойVBA.xlsm").Worksheets("Лист1").Range("A1") = 100

End Sub
Этот пример может показаться немного запутанным для новичка, но на самом деле он довольно прост.
Первая часть до десятичной запятой представляет собой
рабочую книгу, вторая часть представляет собой рабочую таблицу, а третья —
диапазон. Вот еще несколько примеров записи в ячейку
Sub ZapisiVYacheiku()

' Записывает 100 в ячейку A1 листа "Лист1" в МойVBA.xlsm
Workbooks("МойVBA.xlsm").Worksheets("Лист1").Range("A1") = 100

' Записывает «Иван» в ячейку B1 листа «Лист1» в МойVBA.xlsm
Workbooks("МойVBA.xlsm").Worksheets("Лист1").Range("B1") = "Иван"

' Записывает 100 в ячейку A1 таблицы «Счета» в МойVBA.xlsm
Workbooks("МойVBA.xlsm").Worksheets("Счета").Range("A1") = 100

' Записывает дату в ячейку D3 рабочего листа "Лист2" в Книга.xlsx
Workbooks("Книга.xlsx").Worksheets("Лист2").Range("D3") = "112019"

End Sub
Это простой шаблон. Вы можете написать в любую ячейку любого листа из любой книги. Это просто вопрос изменения названия книги, имени листа и диапазона в соответствии с вашими потребностями.
Взгляните на часть книги
Ключевое слово Workbooks относится к совокупности всех открытых рабочих книг. Предоставление имени книги в коллекцию дает нам доступ к этой книге. Когда у нас есть объект, мы можем использовать его для выполнения задач с книгой.
Устранение неполадок в коллекции книг
Когда вы используете коллекцию Workbooks для доступа к книге, вы можете получить сообщение об ошибке:
Run-time Error 9: Subscript out of Range.
Это означает, что VBA не может найти книгу, которую вы
передали в качестве параметра.
Это может произойти по следующим причинам:
- Рабочая книга в настоящее время закрыта.
- Вы написали имя неправильно.
- Вы создали новую рабочую книгу (например, «Книга1») и попытались получить к ней доступ, используя Workbooks («Книга1.xlsx»). Это имя не Книга1.xlsx, пока оно не будет сохранено в первый раз.
- (Только для Excel 2007/2010) Если вы используете два экземпляра Excel, то Workbooks () относится только к рабочим книгам, открытым в текущем экземпляре Excel.
- Вы передали число в качестве индекса, и оно больше, чем количество открытых книг, например Вы использовали
Workbooks (3), и только две рабочие книги открыты.
Если вы не можете устранить ошибку, воспользуйтесь любой из функций в разделе Поиск всех открытых рабочих книг. Они будут печатать имена всех открытых рабочих книг в «Immediate Window » (Ctrl + G).
Примеры использования рабочей книги VBA
Следующие примеры показывают, что вы можете сделать с
книгой.
Примечание. Чтобы попробовать этот пример, создайте две открытые книги с именами Тест1.xlsx и Тест2.xlsx.
Sub SvoistvaRabocheiKnigi()

    ' Печатает количество открытых рабочих книг
    Debug.Print Workbooks.Count

    ' Печатает полное название книги
    Debug.Print Workbooks("Тест1.xlsx").FullName

    ' Отображает полное имя книги в диалоговом окне сообщения.
    MsgBox Workbooks("Тест1.xlsx").FullName

    ' Печатает количество листов в Тест2.xlsx
    Debug.Print Workbooks("Тест2.xlsx").Worksheets.Count

    ' Печатает имя активного в данный момент листа Тест2.xlsx
    Debug.Print Workbooks("Тест2.xlsx").ActiveSheet.Name

    ' Закрывает книгу под названием Тест1.xlsx
    Workbooks("Tест1.xlsx").Close

    ' Закрывает книгу Тест2.xlsx и сохраняет изменения
    Workbooks("Tест2.xlsx").Close SaveChanges:=True

End Sub
Примечание: в примерах кода я часто использую Debug.Print. Эта функция печатает значения в Immediate Window. Для просмотра этого окна выберите View-> Immediate Window из меню (сочетание клавиш Ctrl + G)


Доступ к рабочей книге VBA по индексу
Вы также можете использовать индексный номер с книгами ().
Индекс относится к порядку, в котором книга была открыта или создана.
Workbooks (1) относится к книге, которая была открыта первой. Workbooks (2) относится к рабочей книге, которая была открыта второй и так далее.
' Первая рабочая книга, которая была открыта
Debug.Print Workbooks(1).Name

' Третья рабочая тетрадь, которая была открыта
Debug.Print Workbooks(3).Name

' Последняя рабочая книга, которая была открыта
Debug.Print Workbooks(Workbooks.Count).Name
В этом примере мы использовали Workbooks.Count. Это количество рабочих книг, которые в настоящее время находятся в коллекции рабочих книг. То есть количество рабочих книг, открытых на данный момент. Таким образом, использование его в качестве индекса дает нам последнюю книгу, которая была открыта
Использование индекса не очень полезно, если вам не нужно знать порядок. По этой причине вам следует избегать его использования. Вместо этого вы должны использовать имя рабочей книги вместе с Workbooks ().
Поиск всех открытых рабочих книг
Иногда вы можете получить доступ ко всем рабочим книгам, которые открыты. Другими словами, все элементы в коллекции Workbooks ().
Вы можете сделать это, используя цикл For Each.
Sub PechatImeniFailaEach()

    ' Распечатывает полное имя файла всех открытых рабочих книг
    Dim wrk As Workbook
    For Each wrk In Workbooks
        Debug.Print wrk.FullName
    Next wrk

End Sub
Вы также можете использовать стандартный цикл For для доступа ко всем открытым рабочим книгам.
Sub PechatImeniFailaFor()

    ' Распечатывает полное имя файла всех открытых рабочих книг
    Dim i As Long
    For i = 1 To Workbooks.Count
        Debug.Print Workbooks(i).FullName
    Next i

End Sub
Для доступа к книгам подходит любой из этих циклов.
Стандартный цикл For полезен, если вы хотите использовать другой порядок или
вам нужно использовать счетчик.
Примечание. Оба примера читаются в порядке с первого открытого до последнего открытого. Если вы хотите читать в обратном порядке (с последнего на первое), вы можете сделать это
Sub PechatImeniFailaForKon()

    ' Распечатывает полное имя файла всех открытых рабочих книг
    ' в обратном порядке.
    Dim i As Long
    For i = Workbooks.Count To 1 Step -1
        Debug.Print Workbooks(i).FullName
    Next i

End Sub
Открыть рабочую книгу
До сих пор мы имели дело с рабочими книгами, которые уже открыты. Конечно, необходимость вручную открывать рабочую книгу перед запуском макроса не позволяет автоматизировать задачи. Задание «Открыть рабочую книгу» должно выполняться VBA.
Следующий код VBA открывает книгу «Книга1.xlsm» в папке «C: Документы»
Sub OtkritKnigu()

    ' Откройте книгу и распечатайте количество листов в ней
    Workbooks.Open ("C:ДокументыКнига1.xlsm")

    Debug.Print Workbooks("Книга1.xlsm").Worksheets.Count

    ' Закройте книгу без сохранения
    Workbooks("Книга1.xlsm").Close saveChanges:=False

End Sub
Рекомендуется проверить, действительно ли существует книга,
прежде чем открывать ее. Это предотвратит ваши ошибки. Функция Dir позволяет
вам легко это сделать.
Sub OtkritKniguDir()

    If Dir("C:ДокументыКнига1.xlsm") = "" Then
        ' Файл не существует - сообщение пользователю
        MsgBox "Could not open the workbook. Please check it exists"
    Else
        ' открыть книгу и сделать что-нибудь с ней
        Workbooks.Open("C:ДокументыКнига1.xlsm").Open
    End If

End Sub
Проверить открыта ли книга
Если вы открываете книгу только для чтения, то не имеет значения, открыта ли она уже. Тем не менее, если вы собираетесь обновить данные в рабочей книге, рекомендуется проверить, открыты ли они.
Приведенную ниже функцию можно использовать для проверки,
открыта ли книга в данный момент. Если нет, то откроется рабочая книга. В любом
случае вы получите открытую рабочую книгу.
Function GetWorkbook(ByVal sFullFilename As String) As Workbook

    Dim sFilename As String
    sFilename = Dir(sFullFilename)

    On Error Resume Next
    Dim wk As Workbook
    Set wk = Workbooks(sFilename)

    If wk Is Nothing Then
        Set wk = Workbooks.Open(sFullFilename)
    End If

    On Error Goto 0
    Set GetWorkbook = wk

End Function
Вы можете использовать эту функцию так:
Sub PrimerOtkritiyaKnigi()

    Dim sFilename As String
    sFilename = "C:ДокументыКнига2.xlsx"

    Dim wk As Workbook
    Set wk = GetWorkbook(sFilename)

End Sub
Этот код хорош в большинстве ситуаций. Однако, если рабочая книга может быть открыта в режиме только для чтения или может быть открыта в данный момент другим пользователем, возможно, вы захотите использовать немного другой подход.
Простой способ справиться с этим в этом сценарии состоит в
том, чтобы настаивать на том, что файл должен быть закрыт для успешного запуска
приложения. Вы можете использовать функцию ниже, чтобы просто проверить, открыт
ли уже файл, и если это так, сообщить пользователю, что он должен быть закрыт в
первую очередь.
' Функция для проверки, если книга уже открыта
Function IsWorkBookOpen(strBookName As String) As Boolean

    Dim oBk As Workbook

    On Error Resume Next
    Set oBk = Workbooks(strBookName)
    On Error GoTo 0

    If Not oBk Is Nothing Then
        IsWorkBookOpen = True
    End If

End Function
Пример использования этой функции показан ниже. В этом
случае, если рабочая книга уже открыта, вы сообщаете пользователю, что она
должна быть закрыта для продолжения макроса.
Sub PrimerIsp()

    Dim sFilename As String
    sFilename = "C:tempwritedata.xlsx"

    If IsWorkBookOpen(Dir(sFilename)) = True Then
        MsgBox "File is already open. Please close file and run macro again."
        Exit Sub
    End If

    ' Написать в книгу здесь

End Sub
Если вам нужно проверить, открыта ли книга в другом экземпляре Excel, вы можете использовать атрибут ReadOnly книги. Будет установлено значение true, если оно открыто в другом экземпляре.
Закрыть книгу
Закрыть книгу в Excel VBA очень просто. Вы просто вызываете метод Close рабочей книги.
Обычно, когда вы закрываете книгу в VBA, вы не хотите видеть
сообщения из Excel, спрашивающие, хотите ли вы сохранить файл.
Вы можете указать, сохранять ли книгу или нет, и тогда
сообщения Excel не будут появляться.
' Не сохранять изменения
wk.Close SaveChanges:= False

' Сохранить изменения
wk.Close SaveChanges:= True
Очевидно, что вы не можете сохранить изменения в книге,
которая в данный момент открыта только для чтения.
Сохранить книгу
Мы только что видели, что вы можете сохранить книгу, когда закроете ее. Если вы хотите сохранить его на любом другом этапе, вы можете просто использовать метод Save.
Вы также можете использовать метод SaveAs
wk.SaveAs "C:Резервная копияСчета.xlsx"
Метод WorkAs SaveAs поставляется с двенадцатью параметрами, которые позволяют вам добавить пароль, установить файл только для чтения и так далее. Вы можете увидеть детали здесь.
Вы также можете использовать VBA для сохранения книги в виде копии с помощью SaveCopyAs.
Копировать книгу
Если рабочая книга открыта, вы можете использовать два метода в приведенном выше разделе для создания копии, т.е. SaveAs и SaveCopyAs.
Если вы хотите скопировать книгу, не открывая ее, вы можете использовать FileCopy, как показано в следующем примере:
Sub KopirovatKnigu()
    FileCopy "C:ДокументыДокументы.xlsm", "C:ДокументыПример копии.xlsm"
End Sub
Использование диалогового окна «Файл» для открытия рабочей книги
В предыдущем разделе показано, как открыть книгу с заданным именем. Иногда вам может понадобиться, чтобы пользователь выбрал рабочую книгу. Вы можете легко использовать Windows File Dialog.

FileDialog настраивается, и вы можете использовать его так:
- Выберите файл.
- Выберите папку.
- Откройте файл.
- «Сохранить как» файл.
Если вы просто хотите, чтобы пользователь выбрал файл, вы можете использовать функцию GetOpenFilename.
Следующая функция открывает книгу с помощью диалога файлов.
Функция возвращает полное имя файла, если файл был выбран. Если пользователь
отменяет, он отображает сообщение и возвращает пустую строку.
Public Function UserSelectWorkbook() As String

    On Error Goto ErrorHandler

    Dim sWorkbookName As String

    Dim FD As FileDialog
    Set FD = Application.FileDialog(msoFileDialogFilePicker)

    ' Откройте диалоговое окно файла
    With FD
        ' Установить заголовок диалога
        .Title = "Please Select File"

        ' Добавить фильтр
        .Filters.Add "Excel Files", "*.xls;*.xlsx;*.xlsm"

        ' Разрешить выбор только одного файла
        .AllowMultiSelect = False

        ' Диалог дисплея
        .Show

        If .SelectedItems.Count > 0 Then
            UserSelectWorkbook = .SelectedItems(1)
        Else
            MsgBox "Selecting a file has been cancelled. "
            UserSelectWorkbook = ""
        End If
    End With

    ' Убирать
    Set FD = Nothing
Done:
    Exit Function
ErrorHandler:
    MsgBox "Error: " + Err.Description
End Function
Когда вы вызываете эту функцию, вы должны проверить, отменяет ли пользователь диалог.
В следующем примере показано, как легко вызвать функцию UserSelectWorkbook и обработать случай отмены пользователя.
Public Sub TestViborPolz()

    Dim userBook As Workbook, sFilename As String

    ' Вызовите функцию UserSelectworkbook
    sFilename = UserSelectWorkbook()

    ' Если имя файла возвращается пустым, пользователь отменил
    If sFilename <> "" Then
        ' Откройте книгу и сделайте что-нибудь с ней
        Set userBook = Workbooks.Open(sFilename)
    End If

End Sub
Вы можете настроить диалог, изменив Title, Filters и AllowMultiSelect в функции UserSelectWorkbook.
Использование ThisWorkbook
Существует более простой способ доступа к текущей книге, чем использование Workbooks() . Вы можете использовать ключевое слово ThisWorkbook. Это относится к текущей книге, то есть к книге, содержащей код VBA.
Если наш код находится в книге, называемой МойVBA.xlsm, то ThisWorkbook и Workbooks («МойVBA.xlsm») ссылаются на одну и ту же книгу.
Использование ThisWorkbook более полезно, чем использование Workbooks (). С ThisWorkbook нам не нужно беспокоиться об имени файла. Это дает нам два преимущества:
- Изменение имени файла не повлияет на код
- Копирование кода в другую рабочую книгу не
требует изменения кода
Это может показаться очень маленьким преимуществом. Реальность такова, что имена будут меняться все время. Использование ThisWorkbook означает, что ваш код будет работать нормально.
В следующем примере показаны две строки кода. Один с помощью ThisWorkbook, другой с помощью Workbooks (). Тот, который использует Workbooks, больше не будет работать, если имя МойVBA.xlsm изменится.
Sub IzmenenieImeni()

    ' Обе строки делают одно и то же.
    Debug.Print ThisWorkbook.FullName
    Debug.Print Workbooks("МойVBA.xlsm").FullName

End Sub
Использование ActiveWorkbook
ActiveWorkbook относится к книге, которая в данный момент активна. Это тот, который пользователь последний раз щелкнул.
Поначалу это может показаться полезным. Проблема в том, что
любая рабочая книга может стать активной простым щелчком мыши. Это означает,
что вы можете легко записать данные не в ту книгу.
Использование ActiveWorkbook также затрудняет чтение кода. Из кода может быть не очевидно, какая книга должна быть активной.
Надеюсь, я дал понять, что вам следует избегать использования ActiveWorkbook, если в этом нет необходимости. Если вы должны быть очень осторожны.
Примеры доступа к книге
Мы рассмотрели все способы доступа к книге. Следующий код показывает примеры этих способов.
Sub PrimerDostupaKKnige()

    ' Это рабочая книга, которая уже открыта и называется МойVBA.xlsm.
    Debug.Print Workbooks("МойVBA.xlsm").FullName

    ' Рабочая книга, содержащая этот код
    Debug.Print ThisWorkbook.FullName

    ' Открытая рабочая книга, которая была открыта первой
    Debug.Print Workbooks(1).FullName

    ' Открытая рабочая книга, которая была открыта последней
    Debug.Print Workbooks(Workbooks.Count).FullName

    ' Рабочая книга, которая в настоящее время активна
    Debug.Print ActiveWorkbook.FullName

    ' Рабочая книга не указана - будет использована активная
    Debug.Print Worksheets("Лист1").Name

    ' Закрытая рабочая книга с именем Книга1.xlsm в папке
      'C:Документы
    Workbooks.Open ("C:ДокументыКнига1.xlsm")
    Debug.Print Workbooks("Книга1.xlsm").FullName
    Workbooks("Книга1.xlsm").Close

End Sub
Объявление переменной VBA Workbook
Причина объявления переменной книги состоит в том, чтобы сделать ваш код более легким для чтения и понимания. Проще увидеть преимущество на примере:
Sub OtkrKnigaPerem()

    Dim wrk As Workbook
    Set wrk = Workbooks.Open("C:ДокументыКнига1.xlsm")

    ' Распечатать количество листов в каждой книге
    Debug.Print wrk.Worksheets.Count
    Debug.Print wrk.Name

    wrk.Close

End Sub
Вы можете установить переменную книги с помощью любого из
методов доступа, которые мы видели.
Ниже показан тот же код без переменной рабочей книги.
Sub OtkrKnigaNetPerem()

   Workbooks.Open ("C:ДокументыКнига1.xlsm")

   Debug.Print Workbooks("Книга2.xlsm").Worksheets.Count
   Debug.Print Workbooks("Книга2.xlsm").Name

    Workbooks("Книга2.xlsm").Close

End Sub
В этих примерах разница несущественная. Однако, когда у вас много кода, использование переменной полезно, в частности, для рабочего листа и диапазонов, где имена имеют тенденцию быть длинными, например thisWorkbook.Worksheets («Лист1»). Range («A1»).
Вы можете назвать переменную книги как wrkRead или wrkWrite. Затем вы можете сразу увидеть,
для чего используется эта книга.
Создать новую книгу
Для создания новой рабочей книги вы используете функцию добавления рабочих книг. Эта функция создает новую пустую книгу. Это то же самое, что выбрать «Новая книга» в меню «Файл Excel».
Когда
вы создаете новую книгу, вы, как правило, хотите сохранить ее. Следующий код
показывает вам, как это сделать.
Sub SozdatKnigu()

    Dim wrk As Workbook
    Set wrk = Workbooks.Add

    ' Сохранить как xlsx. Это по умолчанию.
    wrk.SaveAs "C:TempПример.xlsx"

    ' Сохранить как макрокоманду
    wrk.SaveAs "C:TempПример.xlsm", xlOpenXMLWorkbookMacroEnabled

End Sub
Когда вы создаете новую книгу, она обычно содержит три листа. Это определяется свойством Application.SheetsInNewWorkbook.
Если вы хотите, чтобы в новой книге было другое количество
листов, измените это свойство перед созданием новой книги. В следующем примере
показано, как создать новую книгу с семью листами.
Sub SozdatKniguMnStr()

    ' Сохраните значение SheetsInNewWorkbook, чтобы мы могли сбросить его позже
    Dim sheetCnt As Long
    sheetCnt = Application.SheetsInNewWorkbook

    ' Установите листы в новой книге, чтобы быть 7
    Application.SheetsInNewWorkbook = 7

    ' Рабочая книга будет создана из 7 листов
    Dim wrk As Workbook
    Set wrk = Workbooks.Add

    ' Показать количество листов
    Debug.Print "number of sheets: " & CStr(wrk.Worksheets.Count)

    ' Сброс к первоначальному значению
    Application.SheetsInNewWorkbook = sheetCnt

End Sub
With и Workbook
Ключевое слово With облегчает чтение и написание кода VBA.
Использование с означает, что вам нужно упомянуть только один раз. С
используется с объектами. Это такие элементы, как рабочие книги, рабочие
таблицы и диапазоны.
В следующем примере есть два Subs. Первый похож на код,
который мы видели до сих пор. Второй использует ключевое слово With. Вы можете
увидеть код гораздо понятнее во втором Sub. Ключевые слова End With обозначают
конец кода раздела с помощью With.
' Не используется ключевое слово With
Sub NeIspWith()

   Debug.Print Workbooks("Книга2.xlsm").Worksheets.Count
   Debug.Print Workbooks("Книга2.xlsm").Name
   Debug.Print Workbooks("Книга2.xlsm").Worksheets(1).Range("A1")
   Workbooks("Книга2.xlsm").Close

End Sub

' Использование With делает код легче читать
Sub IspWith()

    With Workbooks("Книга2.xlsm")
        Debug.Print .Worksheets.Count
        Debug.Print .Name
        Debug.Print .Worksheets(1).Range("A1")
        .Close
    End With

End Sub
Резюме
Ниже приводится краткое изложение основных моментов этой статьи.
- Чтобы получить рабочую книгу, содержащую код, используйте ThisWorkbook.
- Чтобы получить любую открытую книгу, используйте Workbooks («Пример.xlsx»).
- Чтобы открыть книгу, используйте Set Wrk = Workbooks.Open («C: Папка Пример.xlsx»).
- Разрешить пользователю выбирать файл с помощью функции UserSelectWorkbook, представленной выше.
- Чтобы создать копию открытой книги, используйте свойство SaveAs с именем файла.
- Чтобы создать копию рабочей книги без открытия, используйте функцию FileCopy.
- Чтобы ваш код было легче читать и писать, используйте ключевое слово With.
- Другой способ прояснить ваш код — использовать переменные Workbook.
- Чтобы просмотреть все открытые рабочие книги, используйте For Every wk в Workbooks, где wk — это переменная рабочей книги.
- Старайтесь избегать использования ActiveWorkbook и Workbooks (Index), поскольку их ссылка на рабочую книгу носит временный характер.
Вы можете увидеть краткое руководство по теме в верхней части этой статьи
Заключение
Это был подробная статья об очень важном элементе VBA — Рабочей книги. Я надеюсь, что вы нашли ее полезной. Excel отлично справляется со многими способами выполнения подобных действий, но недостатком является то, что иногда он может привести к путанице.
Чтобы получить максимальную пользу от этой статьи, я рекомендую вам попробовать примеры. Создайте несколько книг и поиграйтесь с кодом. Внесите изменения в код и посмотрите, как эти изменения влияют на результат. Практика — лучший способ выучить VBA.
|
SergKh  Пользователь Сообщений: 4 |
#1 01.08.2018 12:59:02 Выполнение последней строки ниже в 64-разрядной среде вызывает ошибку Run-time error ‘9’:
Изменено: SergKh — 01.08.2018 22:45:54 |
||
|
skais675  Пользователь Сообщений: 2177 |
Быть может стоит указать и расширение книги. |
|
vikttur Пользователь Сообщений: 47199 |
Код в сообщении нужно оформлять с помощью кнопки <…> |
|
SergKh Пользователь Сообщений: 4 |
skais675, у книги нет расширения. Расширение есть у файлов. Но я тем не менее попробовал и конечно не помогло. vikktur, исправил. Изменено: SergKh — 01.08.2018 15:01:20 |
|
sokol92  Пользователь Сообщений: 4445 |
#5 01.08.2018 15:13:13
Проверьте. Откройте любую книгу и выполните макрос
Пример из #1 не понятен. В строке 8 активируется книга, открытие которой не показано. Владимир |
||||
|
skais675 Пользователь Сообщений: 2177 |
#6 01.08.2018 16:06:56 SergKh
Ну до кучи укажите тогда уже и полный путь+файл+расширение.
а потом
И стало бы ясно в чем проблема. Изменено: skais675 — 01.08.2018 16:14:30 Мой канал |
||||
|
Hugo Пользователь Сообщений: 23253 |
А Sheets(«…»).Select может и не сработать… и не по причине отсутствия такого листа. Кстати, в теме опять нет примера… |
|
SergKh Пользователь Сообщений: 4 |
sokol92, skais675, вы совершенно правы с именем книги, причина именно в отсутствии расширения. Проблема РЕШЕНА, ОГРОМНОЕ СПАСИБО! Но только в Office16 похоже расширение является обязательным (и показывается командой MsgBox ActiveWorkbook.Name), его отсутствие вызывает ошибку, а в Office10 — нет (и не обязательно, и не показывается командой MsgBox ActiveWorkbook.Name, поэтому я так и заявил поначалу, и ошибок нет). Вот и получилось — файл работал около года на Office10, но только неделю назад пришлось перейти на Office16 и … Так что название темы действительно можно поменять, только не знаю как. Еще раз ОГРОМНОЕ СПАСИБО! |
|
skais675 Пользователь Сообщений: 2177 |
#9 01.08.2018 16:21:38
Если книга активирована и он видим, и имя верно, тогда почему? Мой канал |
||
|
skais675 Пользователь Сообщений: 2177 |
SergKh
, как же Вы пробовали в #4, что потом получилось в #8? Изменено: skais675 — 01.08.2018 16:23:41 |
|
Hugo Пользователь Сообщений: 23253 |
skais675, если код в модуле другой книги. Именно книги, а не в стандартном. А как там по факту — никому неизвестно… |
|
skais675 Пользователь Сообщений: 2177 |
Hugo
Я ж написал активируем книгу а потом select листа. Изменено: skais675 — 01.08.2018 16:29:46 |
|
Hugo Пользователь Сообщений: 23253 |
Проверили? Ну ведь точно не проверяли Изменено: Hugo — 01.08.2018 16:33:58 |
|
skais675 Пользователь Сообщений: 2177 |
#14 01.08.2018 16:42:08
Проверил, все как я и говорил — не понимаю Вас? Прикрепленные файлы
Изменено: skais675 — 01.08.2018 16:49:53 Мой канал |
||
|
Hugo Пользователь Сообщений: 23253 |
#15 01.08.2018 16:49:58
|
||||
|
skais675 Пользователь Сообщений: 2177 |
Попробовал и в модуль книги, тоже открыл как следует но выдал сообщение «400». Hugo Вы бы уже пояcнили почему происходит эта ошибка? Прикрепленные файлы
Изменено: skais675 — 01.08.2018 22:44:23 |
|
SergKh Пользователь Сообщений: 4 |
skais675
на вопрос #10. Первый раз наверное ошибку при проверке допустил, вот и не помогло, то же самое сообщение вылезло. Но когда увидел что написал MsgBox, уже очень внимательно перепроверил. Остальные после #10 вопросы похоже не ко мне, так что не отвечаю. |
|
Hugo Пользователь Сообщений: 23253 |
Потому что код из модуля ЭтаКнига будет искать лист у себя, а не в активной книге. |
|
skais675 Пользователь Сообщений: 2177 |
#19 01.08.2018 16:59:04 Hugo
однако макрос из модуля книги все делает и лист выделяет из другой книги все как нужно , но вот сообщение выдает. Потому
не соответствует действительности. Изменено: skais675 — 01.08.2018 17:00:39 Мой канал |
||
|
Дмитрий(The_Prist) Щербаков  Пользователь Сообщений: 14182 Профессиональная разработка приложений для MS Office |
#20 01.08.2018 17:05:03
Соответствует. Мат.часть вещь упрямая и непоколебимая Изменено: Дмитрий(The_Prist) Щербаков — 01.08.2018 17:05:54 Даже самый простой вопрос можно превратить в огромную проблему. Достаточно не уметь формулировать вопросы… |
||
|
Hugo Пользователь Сообщений: 23253 |
#21 01.08.2018 17:06:06
— у меня он даже книгу не открывает, ну да это ладно. |
||
|
Дмитрий(The_Prist) Щербаков Пользователь Сообщений: 14182 Профессиональная разработка приложений для MS Office |
#22 01.08.2018 17:09:25
там даже путь к открываемой книге не указан Изменено: Дмитрий(The_Prist) Щербаков — 01.08.2018 17:10:09 Даже самый простой вопрос можно превратить в огромную проблему. Достаточно не уметь формулировать вопросы… |
||
|
sokol92 Пользователь Сообщений: 4445 |
Модераторам: Название темы. Как правильно ссылаться на открытую книгу Excel и листы книги в коде VBA Изменено: sokol92 — 01.08.2018 18:44:54 |
|
skais675 Пользователь Сообщений: 2177 |
#24 01.08.2018 19:30:30 Hugo,
Дмитрий(The_Prist) Щербаков Все верно, невнимателен был с примером
Спасибо за разъяснения! Мой канал |
||
|
RAN  Пользователь Сообщений: 7091 |
#25 01.08.2018 20:08:40
Необходимость указывать расширение определяется настройкой системы «скрывать расширения зарегистрированных типов файлов». |
||